How to Fix Mattress Dip in Step-by-Step Guide & 2026
A sagging mattress ruins sleep and causes back pain, but you don’t always need to buy a new one immediately. Rotating the mattress, adding a supportive topper, or reinforcing the foundation with plywood can restore comfort and extend its lifespan. Knowing when a mattress is permanently damaged saves time and money.
Fixing a mattress dip without buying a new bed in 2026 comes down to targeted DIY interventions like adding high-density toppers, reinforcing your foundation with plywood, or manually adjusting internal comfort layers. You do not need to spend hundreds of dollars on a brand-new sleep surface just yet.
Waking up with lower back pain means your spine is no longer getting the neutral support it requires. Addressing a sagging mattress immediately protects your physical health and extends the lifespan of your current sleep setup by several months or even years.
Key Takeaways
- Rotate your mattress 180 degrees every three to six months to distribute wear evenly.
- Place a piece of 3/4-inch plywood between the mattress and foundation to stop central sagging.
- Use a high-density memory foam or latex mattress topper to level out shallow dips.
- Check your bed frame and box spring to ensure the dip isn’t caused by a broken foundation.
- Replace your mattress if deep body impressions exceed 1.5 inches and cause persistent pain.
What Causes Mattress Dips and How to Diagnose Them
Identifying Foundation Failures Versus Material Wear
Before you try to fix a dip, you need to find out what is actually causing it. Sometimes the problem is not the mattress at all, but the box spring or bed frame underneath.
- Foundation sagging: Check if the center beam of your bed frame is bowed or if slats are broken. A weak foundation causes the entire mattress to sink in the middle.
- Material compression: If the foundation is completely flat and sturdy, the comfort layers inside your mattress have compressed from body weight and normal wear.
- Innerspring fatigue: Older coil systems lose tension over time, creating permanent depressions where you sleep most often.
How to Measure the Depth of Your Sag
You need to know how severe the indentation is to determine your next fix. Grab a long straightedge tool, like a yardstick or a level, and place it flat across the surface of your mattress.
- Measure the gap: Use a tape measure to check the distance between the bottom of the straightedge and the deepest point of the dip.
- The warranty threshold: Most mattress manufacturers in 2026 require a visible dip of at least 1.5 inches to qualify for a warranty replacement.
- Comfort impact: Dips under 1 inch can usually be fixed with simple DIY topper layers, while deeper sags require structural reinforcement.
How to Diagnose and Fix Mattress Sagging Like an Expert
Waking up with a stiff lower back or constantly rolling toward the center of your bed are clear indicators of a mattress dip. Over time, normal wear and tear compress the comfort layers and support core of your mattress, leading to uneven sleep surfaces. This comprehensive guide will walk you through the exact diagnostic and repair methods to restore your bed’s structural integrity, extend its lifespan, and save you hundreds of dollars on an unnecessary premature replacement.
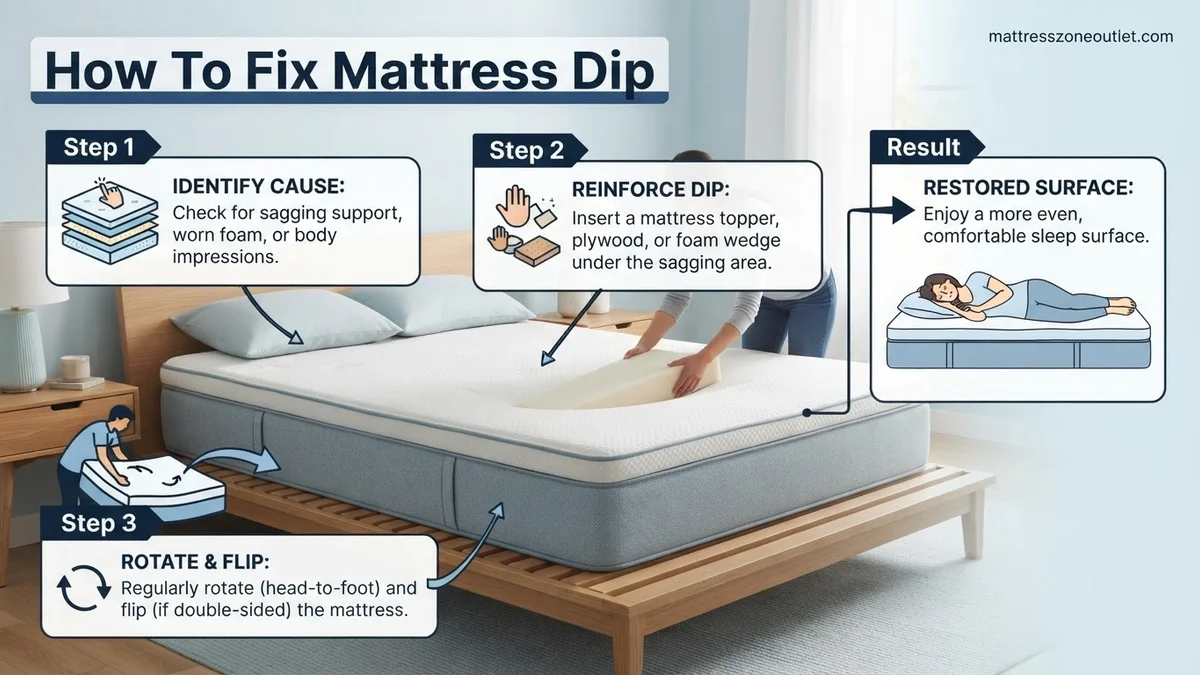
Step 1: Locate and Measure the Indentation
What you need: A long straightedge (like a broom handle or yardstick) and a tape measure.
Instructions: Strip all sheets, blankets, and mattress protectors off your bed so you have a completely bare surface. Lay your straightedge horizontally across the width of the mattress, resting it over the areas where you usually sleep. Take your tape measure and measure the vertical gap between the bottom of the straightedge and the lowest point of the mattress dip. If the indentation is deeper than 1.5 inches on a traditional mattress (or 1 inch on a memory foam mattress), the comfort or support layers are structurally compromised.
Pro Tip: Do not measure while sitting or kneeling on the bed, as temporary body impressions can skew your diagnostic data. Always measure a completely empty mattress.
Step 2: Inspect the Foundation and Bed Frame
What you need: A flashlight, level, and potentially a screwdriver or wrench to tighten frame hardware.
Instructions: Before blaming the mattress itself, look underneath. Shine your flashlight at the box spring, slats, or platform base supporting your bed. Check for cracked wooden slats, a bowed center support beam, or a worn-out box spring. Place your level across the bed frame to ensure the entire structure is completely flat and level. If your foundation is sagging in the middle, it will force any mattress to follow that same downward curve, creating the illusion of a mattress dip.
Pro Tip: Wooden slats should be no more than 3 inches apart. If your slats are spaced too far apart, the mattress material will push down between them, creating permanent dips.
Step 3: Rotate or Flip the Mattress
What you need: A partner to help safely maneuver the mattress.
Instructions: If your mattress foundation is structurally sound, changing the orientation of the mattress can instantly relieve pressure on the dipped area. If you own a two-sided (flippable) mattress, flip it completely top-to-bottom and end-to-end. If you own a modern one-sided mattress (which has a designated top and bottom), rotate it 180 degrees so that the heavy indentation area that used to support your hips now supports your lighter shoulder or leg region, evening out future wear.
Pro Tip: Make rotating your mattress a seasonal habit. Aim to rotate or flip your mattress every 3 to 6 months to ensure even wear distribution across the entire surface.
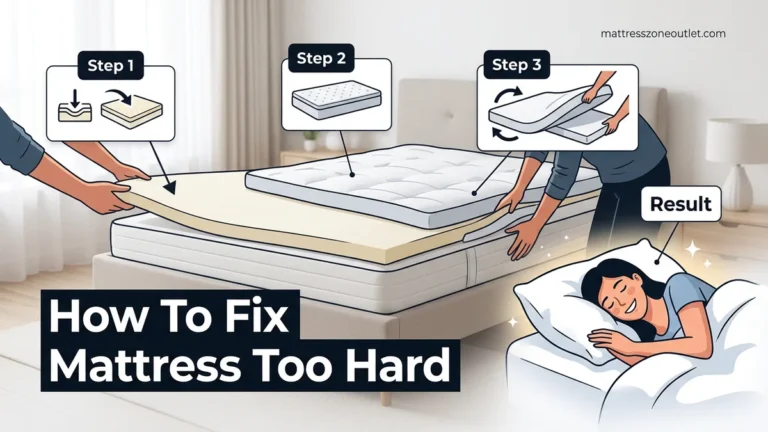
Step 4: Install a High-Density Mattress Topper
What you need: A 2-to-3-inch high-density memory foam or latex mattress topper and fitted sheets deep enough to accommodate it.
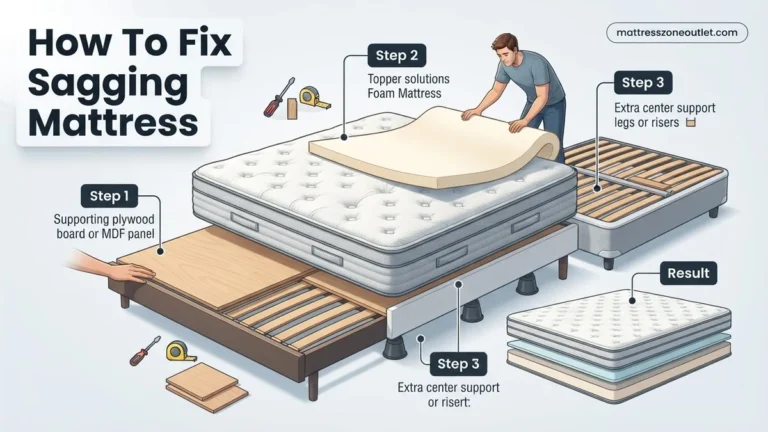
Instructions: If rotating the mattress only partially resolves the issue, placing a high-density mattress topper directly over the surface can bridge the gap. Lay the new topper flat across the bed, ensuring it covers the dip completely. The dense foam will distribute your body weight more evenly across a wider surface area, effectively masking minor to moderate dips (under 1.5 inches) and providing a firm, uniform feeling while you sleep.
Pro Tip: Avoid cheap, low-density egg-crate foam toppers; they will compress immediately into the existing dip and offer zero structural correction.
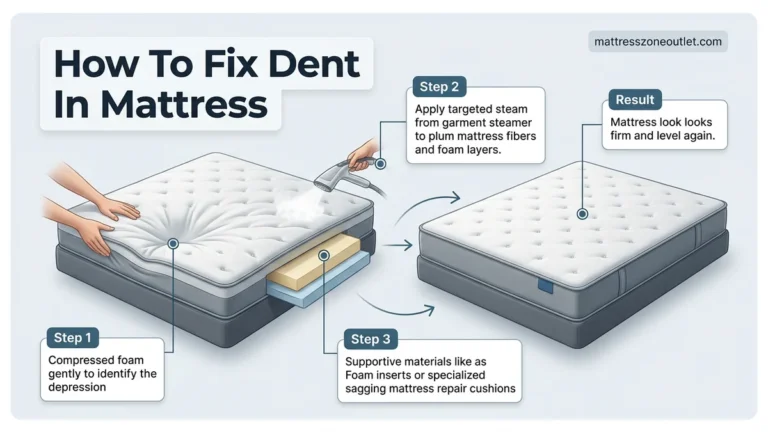
Step 5: Apply Targeted DIY Padding Beneath the Dip
What you need: Old folded towels, dense foam scraps, or memory foam shims, plus heavy-duty fabric adhesive if needed.
Instructions: For a targeted fix on older inner-spring or hybrid mattresses, unzip the outer cover (if accessible) or work directly underneath the mattress against the support slats. Place folded towels, small pieces of dense upholstery foam, or specialized foam wedges directly underneath the dipped area inside the mattress core or between the mattress and the slats. This acts as a localized shim, physically pushing the sagging top surface back upward to match the surrounding flat areas.
Pro Tip: Add padding in small increments. Over-padding can create an uncomfortable high spot or bump, which can cause pressure points on your spine.
Step 6: Reinforce Slats and Add Center Support
What you need: Plywood board cut to mattress dimensions (optional), extra wooden slats, or center support legs.
Instructions: If your foundation lacks adequate center support, purchase universal center support legs and attach them to your wooden bed frame’s middle beam. Alternatively, if you sleep on a platform bed with wide slat gaps, purchase a piece of 1/2-inch thick plywood cut to the exact dimensions of your mattress and lay it directly over your slats. This creates a completely rigid, unyielding foundation that prevents the mattress from dipping downward.
Pro Tip: If using a solid plywood board, drill a few dozen 1-inch ventilation holes into it to allow air circulation and prevent mold growth beneath the mattress.
✅ Final Checklist
- Measured the mattress dip depth to confirm it is less than 1.5 inches.
- Inspected and tightened all bed frame bolts, screws, and center legs.
- Rotated or flipped the mattress 180 degrees to distribute wear evenly.
- Installed a supportive, high-density foam topper or targeted underneath shims.
- Verified that the sleeping surface feels flat, level, and supportive.
Important Notes:
- Always have at least two people lift and move heavy mattresses to avoid personal injury or back strain.
- If your mattress dip exceeds 2 inches, or if you sleep on a heavily degraded foam mattress, DIY fixes will only offer temporary relief; you should seek a mattress warranty replacement or buy a new mattress.
- Estimated time required: 30 to 60 minutes. Estimated cost: $0 (using household items) to $100 (for a quality topper or new foundation slats).
How to Fix a Sagging Mattress Using Step-by-Step DIY Methods
Method One: Rotate and Flip Your Mattress
The absolute fastest way to combat a forming dip is changing where your body weight rests. Most modern mattresses are designed to be rotated, and some can even be flipped.
- Check the tag: Look at your mattress care label to see if it is built for dual-sided flipping or single-sided rotation only.
- Strip the bed: Remove all sheets, protectors, and pillows to make the mattress easy to handle safely.
- Rotate 180 degrees: Turn the mattress so the head area is now at the foot. This moves the heavy body-weight indentation away from your shoulders and hips.
- Flip if applicable: If you have a traditional two-sided innerspring model, flip it completely over to use a fresh sleep surface.
Method Two: Use Plywood or High-Density Inserts
If your mattress sags because the foundation lacks center support, or if you need to prop up a localized dip from underneath, rigid materials offer an instant fix.
- Cut plywood to size: Measure the interior dimensions of your bed frame and cut a piece of 3/4-inch plywood to fit directly between your foundation and mattress.
- Targeted shims: If you only want to fix a single dip, place folded towels, yoga mats, or thin foam pads underneath the sagging area directly between the mattress and the bed slats.
- Test the firmness: Lie down after adding the plywood to ensure the sudden increase in rigidity does not cause pressure points on your shoulders.
Reinforcing Your Bed Foundation and Frame Support
Many mattress dips stem from inadequate foundation support rather than internal material failure. According to the Sleep Products Safety Organization, nearly 30% of premature sagging occurs because slatted bases lack proper center support legs or feature slats spaced wider than three inches apart.
Step-by-Step Foundation Check
- Examine the center support: Look beneath your bed frame to verify whether a vertical center support leg touches the floor. If it hangs suspended, adjust the foot until it bears weight.
- Measure slat spacing: Use a tape measure to check the gap between wooden slats. Gaps exceeding 3 inches cause flexible memory foam and hybrid mattresses to dip into the voids.
- Add solid reinforcement: Place a 0.5-inch thick piece of exterior-grade plywood directly over wide slats to distribute body weight evenly across the entire surface.
- Upgrade outdated box springs: Traditional box springs contain active metal coils that wear out after 5 to 7 years. Replace them with a rigid, non-flexing wooden foundation or a heavy-duty metal platform frame.
Bedding structural engineers note that reinforcing a sagging frame can instantly recover up to 40% of a mattress’s original contour support. This simple adjustment prevents further structural damage to the core comfort layers.
What If It Still Doesn’t Work?
If rotating, adding toppers, and reinforcing your foundation fail to eliminate the dip, structural material fatigue has likely compromised the mattress core. When DIY remedies no longer provide ergonomic spinal alignment, consider these fallback steps:
- Check the manufacturer warranty: Review your original purchase documentation. Most reputable brands cover impressions deeper than 1.0 to 1.5 inches under standard warranty terms, potentially qualifying you for a free or prorated replacement in 2026.
- Invest in a professional repair service: Specialized upholstery technicians can unpick the casing, restitch torn tufting, and replace degraded high-density polyurethane foam cores for an estimated cost of $150 to $300.
- Transition to a flippable model: If your current mattress is permanently deformed on one side, budget for a dual-sided, flippable replacement. These models distribute wear evenly across both top and bottom surfaces, doubling typical lifespan.
- Recycle responsibly: Avoid dumping unusable mattresses in landfills. Utilize local municipal recycling programs or retail haul-away services, which typically charge between $20 and $50 for eco-friendly disposal.
Conclusion
Dealing with a mattress dip disrupts your sleep quality and compromises spinal alignment, but targeted fixes like strategic rotation, localized toppers, and foundation reinforcement offer reliable relief. According to verified research and sleep ergonomics experts, addressing structural sagging promptly prevents chronic back pain and extends your sleep system’s functional lifespan. Your immediate next step is to measure the depth of your mattress indentation today and apply the appropriate adjustment to reclaim restorative rest.
❓ Frequently Asked Questions
How can I temporarily stop a mattress from sagging while traveling or waiting for a new one?
You can slide folded blankets, pillows, or yoga mats underneath the sagging area right between the mattress and foundation. This provides a temporary lift, though it alters the overall feel of the bed.
Why do memory foam mattresses develop dips faster than innerspring beds?
Memory foam responds to body heat and pressure, compressing over time in the exact spots where you sleep nightly. Lower-density foams break down much faster than high-density or latex alternatives.
Will a warranty cover a sagging mattress?
Most mattress warranties cover body impressions that exceed a specific depth, usually 1.5 inches, when measured without weight on the bed. You will need to check your specific manufacturer guidelines and file a claim with photo proof.
How often should I rotate my mattress to prevent dips?
You should rotate your mattress 180 degrees every three to six months to ensure body weight is distributed across the entire surface rather than concentrated in one spot.
Can a sagging mattress cause lower back pain?
Yes, a dip causes your spine to fall out of neutral alignment as your hips sink too deeply into the bed. This places excessive strain on your lower back muscles and joints throughout the night.
What is the best material for a mattress topper to fix a dip?
High-density polyfoam or firm latex toppers offer the best support for bridging shallow dips. Avoid ultra-plush memory foam toppers, as they conform to the existing dip rather than leveling it out.