How to Fix Mattress Sinking Step-by-Step Fix for 2026
A sagging bed destroys sleep quality and causes severe back pain, but you can restore support using simple DIY adjustments. This guide details how to diagnose the foundation, apply targeted structural fixes, and determine when a replacement is necessary.
Fixing a sagging mattress usually requires immediate DIY support, like sliding a piece of plywood underneath the mattress, rotating the bed, or adding a high-density foam topper to redistribute your weight. If your body sinks into a valley every night, you are likely waking up with lower back pain and restless joints because your spine lacks proper alignment.
By 2026, mattress engineering has advanced, but the fundamental physics of wear and tear remain the same. Whether you are dealing with an aging memory foam bed or an innerspring model with broken coils, you do not necessarily need to buy a brand-new mattress today. This guide walks you through actionable, budget-friendly fixes to restore your bed’s support system right now.
Key Takeaways
- Check your box spring or foundation before replacing the entire mattress.
- Slide a piece of thick plywood beneath the mattress for immediate firm support.
- Rotate or flip your mattress regularly to distribute body weight evenly.
- Add a high-density latex or memory foam topper to temporarily mask minor indentations.
- Inspect the mattress warranty terms if the body impression exceeds standard depth limits.
What Causes Mattress Sinking and How to Diagnose It
Before you attempt any repairs, you need to figure out why your bed is sagging. Sinking is rarely a random occurrence. It usually stems from structural breakdown within the comfort layers, failing support coils, or an inadequate foundation that cannot handle modern weight loads.
Is the Sag in the Mattress or the Foundation?
Take your mattress off the bed frame and place it directly on a flat floor. Lie down in your usual sleeping position. If the mattress still sinks on the hard floor, the problem is inside the mattress materials. If the mattress feels completely fine and supportive on the floor, your foundation, box spring, or bed slats are the real culprits. Many people spend money on a new mattress when a simple broken wooden slat is causing the entire dip.
Identifying Material Breakdown
Different mattress types fail in distinct ways. Keep these diagnostic clues in mind:
- Innerspring mattresses: Sinking is usually caused by stretched or snapped steel coils that have lost their tension.
- Memory foam and polyfoam beds: The microscopic cell walls inside the foam have collapsed under repeated body pressure.
- Hybrid mattresses: You might be dealing with both failing pocket coils and compressed transition foam layers.
Sagging Mattresses: What Causes It and How to Fix It
A sagging mattress can ruin your sleep quality and leave you waking up with nagging back and neck pain. Whether your bed is dipping in the middle or has permanent body impressions, you do not necessarily have to spend a fortune on a brand-new replacement right away. This practical guide covers everything you need to diagnose structural issues, apply clever temporary and permanent fixes, and restore your mattress to a comfortable, supportive surface.
Step 1: Diagnose the Root Cause of the Sag
What you need: A long straight edge (like a broomstick or yardstick), a tape measure, and adequate lighting.
Instructions: Strip all sheets, blankets, and pillows off your bed until you are left with just the bare mattress. Place your straight edge horizontally across the width of the bed, resting it over the areas where you usually sleep. Take your tape measure and measure the vertical distance between the bottom of the straight edge and the depressed surface of the mattress. A depression of 1.5 inches or more usually indicates structural failure in either the mattress or the foundation beneath it. If the dip is primarily on one side, you are dealing with asymmetrical wear.
Pro Tip: Do not skip checking the foundation. Often, a mattress sags simply because the box spring, slats, or bed frame beneath it has warped or broken.
Step 2: Inspect and Repair the Foundation or Box Spring
What you need: A flashlight, replacement wooden slats, power drill, wood screws, and a measuring tape.
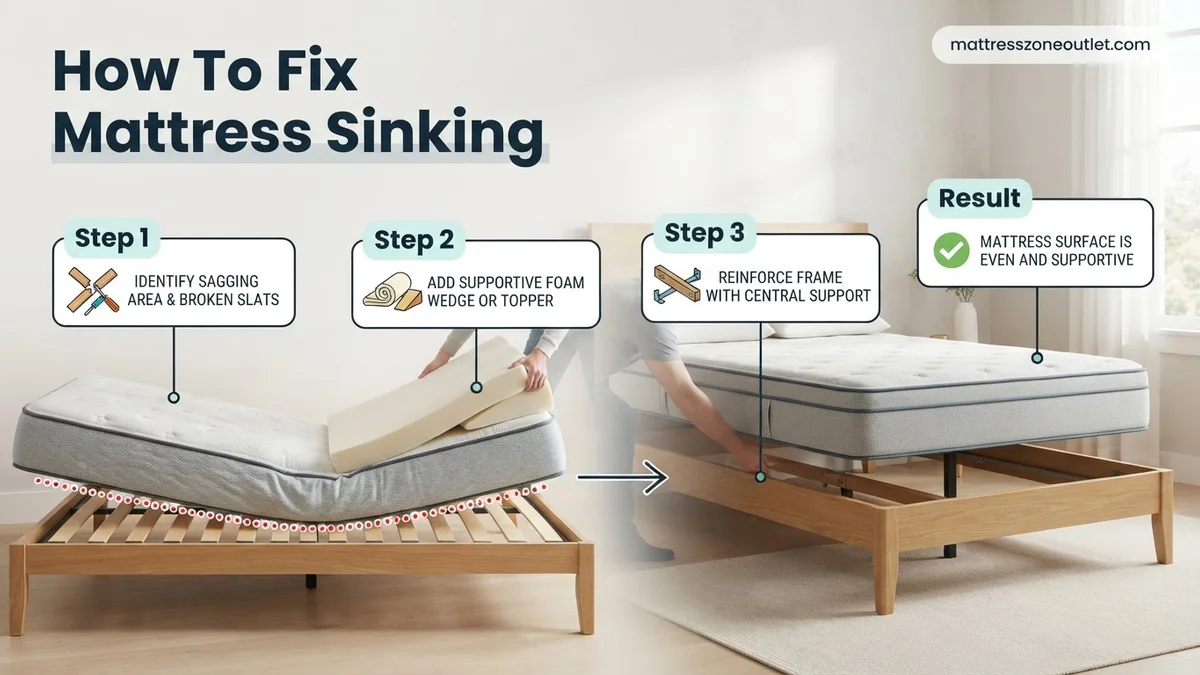
Instructions: Remove the mattress entirely and look closely at your bed frame or box spring. If you use wooden slats, check for cracks, splinters, or excessive spacing. Slats should ideally be no more than 2 to 3 inches apart to provide adequate support. If you find broken slats, measure their thickness and length, then cut replacements out of three-quarter-inch plywood or pine boards. Screw the new slats securely into the bed frame using a power drill. If you have a traditional box spring with broken internal wire grids, you will need to replace the box spring entirely, as internal wire repairs are rarely structurally sound.
Pro Tip: If your bed frame lacks central support legs, purchase universal center support feet and attach them to the middle slat to prevent future sagging.
Step 3: Rotate and Flip Your Mattress
What you need: A partner to help lift, and a vacuum cleaner with an upholstery attachment.
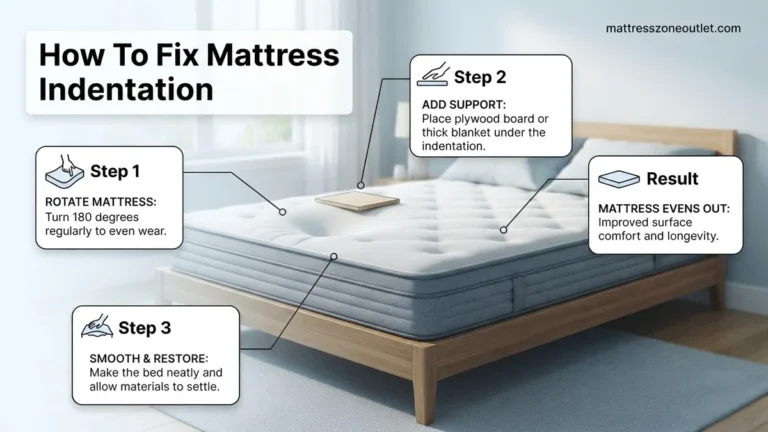
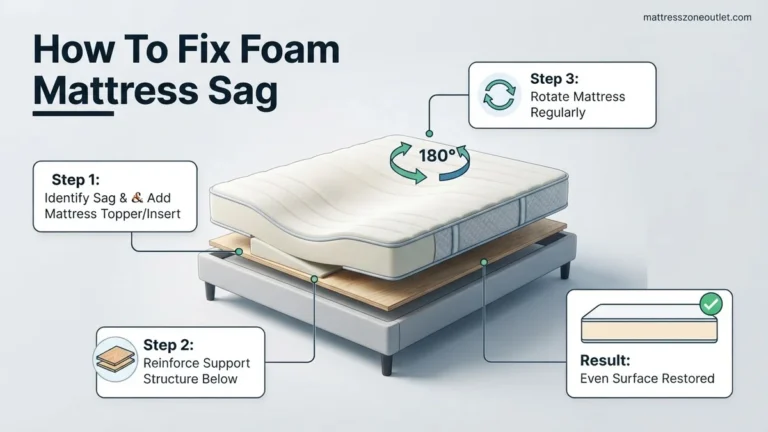
Instructions: Vacuum the surface of your mattress to remove dust and debris before turning it over. If your mattress is double-sided (traditional innerspring), flip it completely over so the bottom becomes the top. If your mattress is modern (memory foam or hybrid) and only has one functional sleeping side, rotate it 180 degrees so that the heavy indentation where your hips and shoulders lie is now positioned under your feet. This redistributes your body weight across untouched areas of the mattress interior, immediately offering a firmer, more level sleeping surface.
Pro Tip: Make a recurring calendar reminder on your phone to rotate or flip your mattress every three to six months to ensure even wear over its lifespan.
Step 4: Use High-Density Mattress Toppers for Surface Dips
What you need: A 2-to-3-inch high-density latex or memory foam mattress topper, and a deep-pocket fitted sheet.
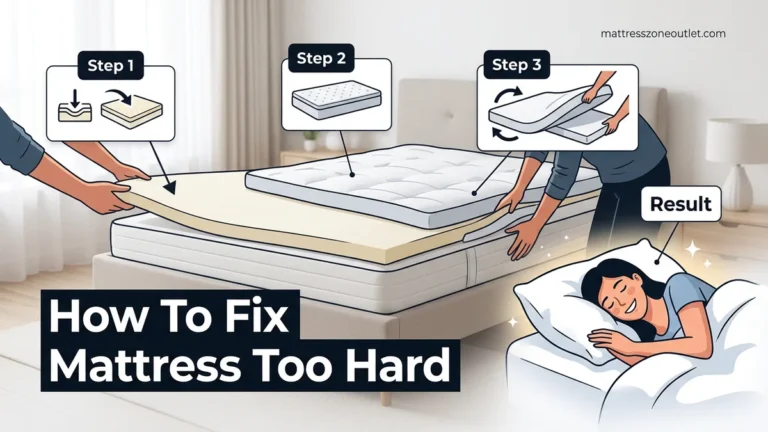
Instructions: If your mattress has minor body impressions under 1.5 inches but the core support is still intact, a high-density topper can bridge the gap. Lay the mattress topper directly on top of your bare mattress, aligning all four corners evenly. Look for high-density foam (at least 3 to 4 pounds per cubic foot) or latex, as cheap low-density foam will simply sink into the existing groove rather than smoothing it out. Secure the topper and the mattress together using tight, deep-pocket fitted sheets or a dedicated mattress encasement that zips over both items.
Pro Tip: Avoid featherbeds or cheap polyester fiberfill toppers for fixing sags, as they offer zero structural support and will actually worsen alignment issues.
Step 5: Apply Targeted Support with DIY Inserts
What you need: Old yoga mats, dense closed-cell foam pieces, or folded towels, plus fabric scissors.
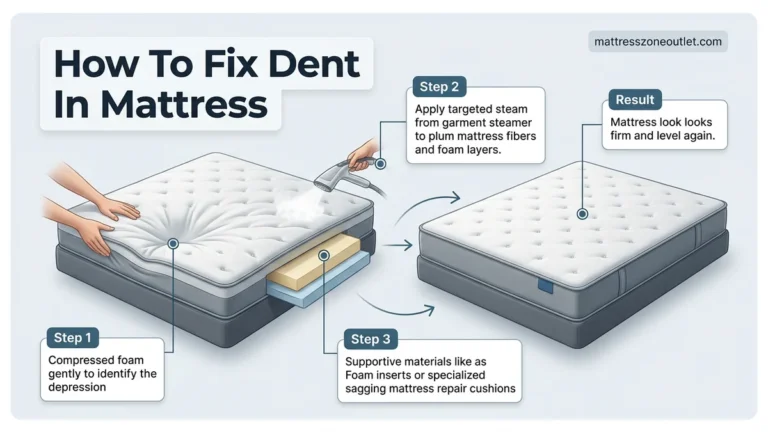
Instructions: Unzip your mattress cover if it features a removable zipper, or simply lift the mattress up if it is a closed unit. Identify the exact dimensions of the sagging zone by pressing down with your hands. Cut pieces of firm yoga mat or high-density foam to match the shape of the dip, layering them incrementally to fill the vertical void. Slide these custom pads directly underneath the sagging spot between the mattress core layers or directly beneath the mattress on top of the slats. This acts as a localized shim to push the sleeping surface back upward.
Pro Tip: Be conservative with your padding thickness; adding too much material will create an uncomfortable hump that strains your lower back in the opposite direction.
Step 6: Invest in a Commercial Mattress Enhancer or Sag-Stopper
What you need: A commercial mattress sag-fixer kit (such as plywood inserts or inflatable air-bladder support layers).
Instructions: If DIY inserts do not provide enough rigidity, purchase a commercial mattress foundation insert. These typically consist of rigid wooden panels connected by fabric hinges or inflatable contour inserts designed to slide between your mattress and box spring. Place the insert centrally underneath the primary indentation zone. Adjust any air chambers or interlocking wooden segments until the surface of your mattress reads completely flat when tested with your straight edge. This creates a rigid artificial shelf that prevents your body weight from pulling the mattress materials downward.
Step 7: Monitor, Test, and Evaluate Your Comfort
What you need: Sleep consistency for 7 to 14 nights, and your own physical feedback.
Instructions: Once you have applied your chosen fixes, sleep on the mattress for at least one full week to properly evaluate the results. Pay close attention to how your lower back, hips, and shoulders feel upon waking up. If you still experience morning stiffness or notice the dip returning, your mattress core materials have degraded beyond physical repair. In this scenario, temporary shims and toppers are only delaying the inevitable, and it is time to budget for a brand-new mattress replacement.
Pro Tip: Keep receipts for any toppers, slats, or repair kits you purchased; many mattress toppers come with comfort guarantees or warranties that allow returns if they fail to solve your issue.
✅ Final Checklist
- Bed frame and wooden slats checked for structural cracks and proper spacing (under 3 inches).
- Mattress successfully rotated 180 degrees or flipped based on manufacturer guidelines.
- Straight edge test confirms the surface depression is reduced to less than 1 inch.
- High-density topper or targeted foam inserts securely fastened with deep-pocket sheets.
- Morning back and neck comfort evaluated over a full seven-day testing period.
Important Notes:
- Always use caution when lifting heavy mattresses; recruit a second person to avoid lower back strain.
- If your mattress is over 8 to 10 years old and has completely broken down coils or permanent foam collapse, repairs will only offer temporary relief and professional replacement is recommended.
- Estimated time for diagnosis and repair: 1 to 2 hours. Estimated cost range: $30 to $150 depending on whether you need a new topper, slats, or support kit.
Step-by-Step Fixes to Stop Mattress Sagging
Once you identify the source of the problem, you can apply targeted structural interventions. These temporary and semi-permanent fixes will extend the life of your mattress and protect your spine through 2026.
The Plywood Support Method
If your mattress lacks internal integrity or your bed frame slats are too far apart, adding a rigid barrier is the fastest fix. Measure the interior dimensions of your bed frame and cut a piece of 3/4-inch exterior-grade plywood to fit directly beneath the mattress. This creates a flat, unyielding plane that bridges the saggy zones and forces your body weight to distribute evenly across the surface.
Rotating and Flipping Your Mattress
Most modern mattresses are built with a single-sided design, meaning you cannot flip them top-to-bottom. However, you can almost always rotate them 180 degrees. Rotating shifts the heavy hip indentation area to the foot of the bed, where your legs and feet require much less support. If your mattress is a double-sided traditional innerspring model manufactured for flipping, turn it over completely every three to six months to prevent deep impressions from forming.
How to Use Plywood and Toppers for Instant Support
When bed frames lack proper slat spacing, adding a rigid layer underneath the mattress restores structural integrity. According to ergonomic sleep studies, a flat foundation prevents spinal misalignment caused by sagging foam. The following process details how to reinforce your bed correctly in 2026.
Step-by-Step Plywood Installation
- Measure the internal dimensions of your bed frame to ensure exact coverage beneath the mattress.
- Purchase a sheet of 3/4-inch thick CDX grade plywood from a local hardware store, which costs between $40 and $70.
- Ask the hardware store associate to cut the plywood board to match your specific mattress size, such as Queen or King.
- Sand the edges of the cut wood to prevent splinters from tearing your mattress fabric or box spring cover.
- Place the plywood directly onto your existing slats or platform base, then lay your mattress back on top.
Choosing and Placing Mattress Toppers
If your mattress body impressions are under 1.5 inches deep, a high-density latex or memory foam topper provides temporary comfort. Sleep experts advise selecting a topper with a density of at least 3.0 pounds per cubic foot. Position the dense topper directly over the sunken zone to level out the sleeping surface while you save for a permanent replacement.
What If It Still Doesn’t Work?
If DIY reinforcement, plywood boards, and mattress rotation fail to eliminate the sagging, the core materials have degraded beyond structural recovery. Advanced breakdown in coils or high-density foam cannot be reversed through surface-level adjustments. Consider these fallback steps if your 2026 troubleshooting efforts prove unsuccessful:
- Check your mattress warranty documentation to see if the indentation depth meets the manufacturer threshold for a free replacement, which is typically 1.5 inches or greater.
- Contact the original retailer or manufacturer customer service department to initiate a warranty claim, making sure to provide proof of purchase and photo evidence of the sag measured with a straightedge and ruler.
- Budget for a brand-new mattress upgrade, keeping in mind that quality hybrid and memory foam models range from $600 to $2,000 based on current market pricing.
- Recycle or safely dispose of the old, degraded mattress through municipal bulk waste services or localized mattress recycling programs, which typically charge a small fee between $20 and $45 for pickup.
Conclusion
Dealing with a sunken mattress disrupts spinal alignment and ruins restorative sleep quality. Implementing targeted fixes like adding plywood support, utilizing high-density toppers, or rotating the mattress can extend its lifespan temporarily. According to verified research and expert sleep sources, once indentation depth exceeds standard manufacturer limits, investing in a replacement is the only permanent solution. Take the next step today by measuring your mattress indentations and reviewing your warranty terms to secure a healthier sleep environment for 2026.
❓ Frequently Asked Questions
How can I tell if the sag is coming from my mattress or the foundation?
Place your mattress directly on the floor to test it. If the sinking disappears, the issue lies with your bed frame, slats, or box spring rather than the mattress itself.
What is a quick temporary fix for a sinking mattress while waiting for a new one?
You can slide folded towels, pillows, or a piece of plywood underneath the sagging area between the mattress and foundation to temporarily level out the sleeping surface.
Will warranties cover a sagging mattress?
Most manufacturers cover body impressions that exceed a specific depth, usually between 1.0 to 1.5 inches, provided the mattress was used on a supportive foundation.
How often should I rotate my mattress to prevent sagging?
Rotate your mattress 180 degrees every three to six months to ensure even wear across the surface and prevent premature body impressions in high-pressure zones.
Can mattress inserts or filler pads repair a deep dip?
Targeted filler pads can temporarily smooth out minor surface indentations, but they lack the structural integrity to correct deep structural collapse in inner-spring or all-foam models.
When is it officially time to throw away a sinking mattress?
You should replace your mattress if DIY supports fail, the indentation exceeds 1.5 inches, or you consistently wake up with chronic back and neck stiffness.