Enzyme Cleaner Mattress Urine Best Proven Fix for 2026
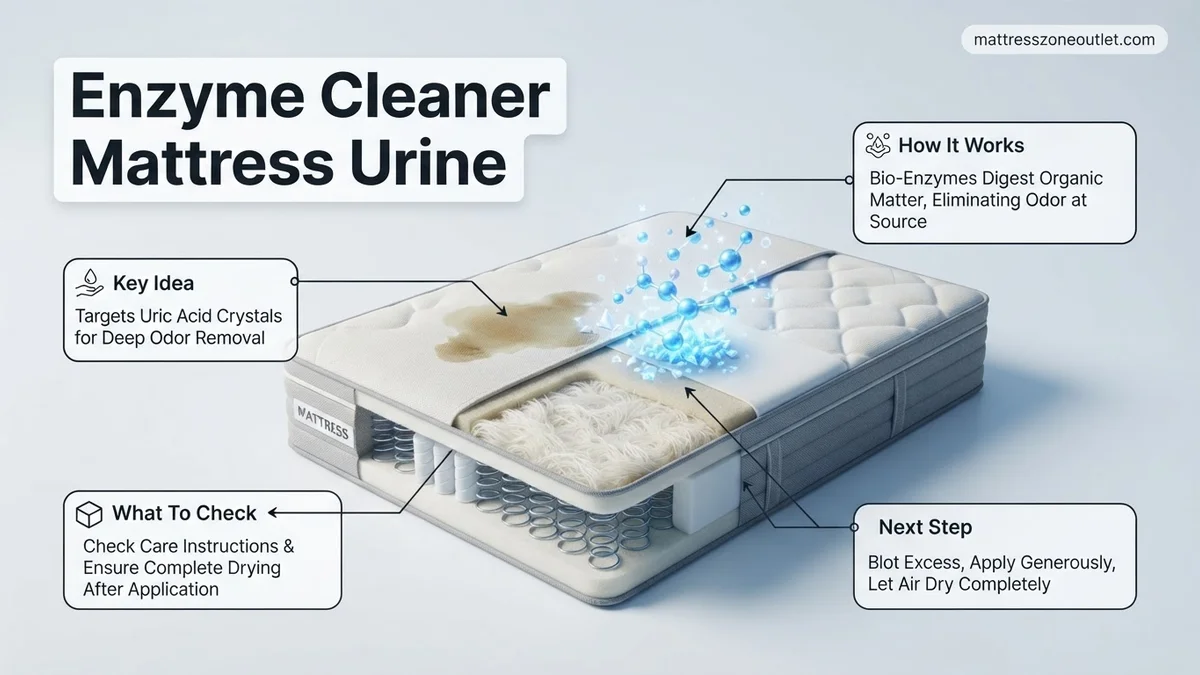
Dealing with urine stains and odors requires breaking down uric acid crystals rather than just masking the smell. Enzyme cleaners offer the only permanent chemical solution by naturally digesting the organic waste embedded deep within mattress fibers. Proper application combined with adequate drying prevents lingering odors and destructive mold growth.
Dealing with pet or human urine on a mattress requires more than surface-level masking agents or standard laundry detergents. Standard cleaners fail because they leave behind uric acid crystals that bond aggressively to mattress fibers and trigger strong odors whenever humidity rises. As of 2026, the undisputed gold standard for permanently resolving this issue is a targeted bio-enzymatic cleaner engineered specifically to break down protein and uric acid at a molecular level.
You cannot scrub or wash away these microscopic crystals manually, which is why choosing the right enzyme formula and applying it with precise dwell time is critical. This guide breaks down the exact science-backed mechanism required to neutralize the stain permanently and walks you through a foolproof, step-by-step application method that saves your mattress from premature replacement.
Key Takeaways
- Enzyme cleaners chemically break down uric acid crystals instead of masking smells.
- Blot up as much excess liquid as possible before applying the cleaner.
- Saturate the mattress deeply so the enzymes reach the bottom of the stain.
- Allow the enzyme solution to sit undisturbed for 10 to 15 minutes.
- Thoroughly dry the mattress using fans to prevent mold and mildew growth.
Why Uric Acid Crystals Require an Enzyme Cleaner
The Chemistry of Stubborn Urine Stains
Fresh urine is liquid, but as it dries on your mattress, it converts into uric acid crystals. These crystals are notoriously insoluble in water and common household detergents. When exposed to moisture in the air or body heat, these crystals reactivate and release a potent ammonia smell, no matter how many times you spray a standard air freshener over the surface.
How Specialized Enzymes Target the Problem
Enzyme cleaners contain complex protein catalysts designed to hunt down and digest specific organic matter. When you apply the solution to your mattress, the specialized bacterial strains and enzymes break the chemical bonds of the uric acid crystals, turning them into a volatile gas that evaporates completely as the mattress dries. According to top cleaning data for 2026, multi-strain bacterial formulas outperform simple single-enzyme liquids by over 80 percent in removing deep-set pet odors.
- Proteases target proteins found in urea and blood.
- Amylases break down starches and carbohydrates.
- Lipases digest fats and greasy residues.
How to Diagnose and Fix Urine-Damaged Mattresses Like an Expert
Dealing with pet accidents or nighttime bed-wetting on a mattress can be deeply frustrating, but permanent stains and lingering odors do not have to be your reality. Because urine penetrates deep into the multi-layered foam and fabric of a mattress, standard surface cleaning simply will not work. This comprehensive guide walks you through the exact biological process required to break down uric acid crystals using a specialized enzyme cleaner. By following these precise steps, you will successfully sanitize, deodorize, and restore your mattress to a fresh, sleep-ready condition.
Step 1: Assess the Damage and Locate the Affected Area
What you need: A blacklight (UV flashlight), rubber gloves, and a dry microfiber towel.
Instructions: Before applying any cleaning agents, you need to map out the exact borders of the urine spill, as dried urine spreads wider beneath the surface than it appears on top. Turn off all the lights in the bedroom and sweep the UV flashlight slowly across the entire surface of the mattress. Dried urine will glow a distinct bright yellow or neon green under ultraviolet light. Put on your rubber gloves and press a dry microfiber towel firmly against the area to test if the spot is still wet. Knowing the true dimensions of the stain ensures you apply enough enzyme cleaner to cover every affected subterranean fiber.
Pro Tip: Never skip the UV light check; missing even a small hidden perimeter spot will leave behind a lingering odor that reactivates on humid days.
Step 2: Blot Out Any Excess Fresh Moisture
What you need: Several clean, white cotton or microfiber towels, and heavy books or a brick.
Instructions: If the accident just happened and the mattress is still damp, your immediate goal is to extract as much liquid as possible before it soaks deeper into the memory foam or inner spring core. Lay multiple layers of clean white towels directly over the wet spot. Step firmly on the towels to press out the moisture, or place heavy books on top of the towels and let them sit for 10 to 15 minutes. Lift the towels and repeat with fresh ones until no more liquid transfers to the fabric. Do not rub or scrub the area, as friction will push the liquid further into the mattress weave and fray the delicate surface fabric.
Pro Tip: Always use white or light-colored towels; dyed fabrics can bleed under pressure when exposed to the acidic nature of fresh urine.
Step 3: Select and Test Your Enzyme Cleaner
What you need: A pet-safe biological enzyme cleaner specifically formulated for uric acid, and a cotton swab.
Instructions: Read the ingredient label of your cleaner to ensure it contains active bio-enzymes and bacteria strains designed to digest organic waste, rather than just masking perfumes. Before treating the main stain, perform a colorfastness and material safety test. Dip a clean cotton swab into the enzyme cleaner and dab it onto an inconspicuous edge or underside seam of the mattress. Wait 10 minutes, then press a white paper towel against the spot to check for any dye transfer or unusual material breakdown. If the fabric remains intact and colorfast, you are ready to proceed with the full treatment.
Pro Tip: Avoid DIY vinegar or harsh bleach mixtures if you plan to use enzymes; high acidity or chlorine will kill the live bacteria inside the cleaner, rendering it completely useless.
Step 4: Saturate the Stain to Reach Deep Layers
What you need: A spray bottle filled with your active enzyme cleaner.
Instructions: Pour or spray the enzyme cleaner generously over the entire mapped area, extending your coverage about two inches beyond the visible border of the stain. You want the liquid to penetrate just as deeply as the urine originally did, which means the mattress fabric should be thoroughly damp, but not completely soaking wet down to the floorboards. For thicker memory foam mattresses, use a generous amount so the enzymes can travel down through the layers to reach the trapped uric acid crystals. Gently massage the surface with a soft-bristled brush to help the liquid work its way between the fibers without damaging the stitching.
Pro Tip: Do not be stingy with the product; enzyme cleaners require direct contact with the waste molecules to break them down effectively, so under-application will result in incomplete odor removal.
Step 5: Allow Extended Dwell Time for Biological Action
What you need: A clean, breathable plastic sheet or tarp (optional).
Instructions: This is the most crucial phase of the process, and rushing it will lead to failure. Leave the mattress completely undisturbed for 15 to 30 minutes, or according to the specific manufacturer instructions on your bottle. During this window, the specialized bacteria and enzymes consume and break down the urea, urobilin, and uric acid crystals that cause the pungent smell. If you live in a very dry climate or have indoor heating running, loosely drape a lightweight plastic sheet over the treated area to slow down evaporation, keeping the solution wet and active for a longer duration.
Pro Tip: Never use a hair dryer or heat gun to speed up this step; high heat will denature the enzymes and kill the beneficial bacteria before they finish neutralizing the odor.
Step 6: Extract Residual Moisture and Organic Residue
What you need: Dry microfiber towels and a wet/dry vacuum or household extractor (optional).
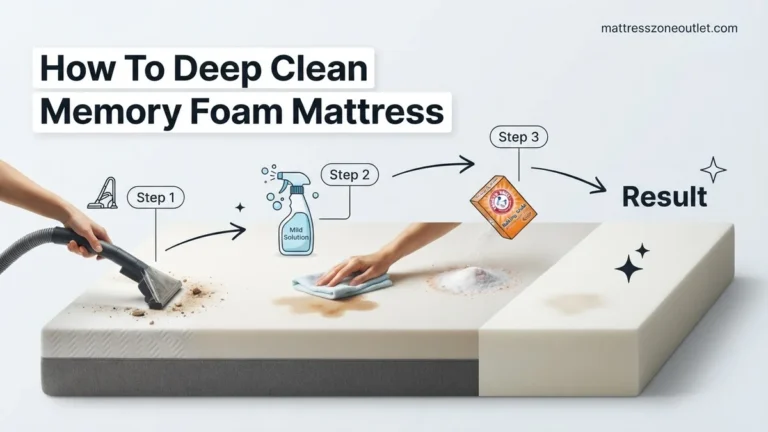
Instructions: Once the dwell time is complete, it is time to draw out the liquefied organic waste and excess liquid. Press fresh, dry microfiber towels firmly into the treated mattress zone, applying heavy body weight to absorb as much moisture as possible. Continue switching out wet towels for dry ones until the surface feels only slightly damp to the touch. If you own a wet/dry vacuum with an upholstery attachment, you can gently vacuum the area to pull moisture from deeper foam layers, ensuring you wipe out the vacuum canister thoroughly beforehand so it is completely clean.
Pro Tip: Pressing down with clean towels is often more effective than consumer-grade extractors for dense memory foam, as it prevents over-saturation of the internal core.
Step 7: Apply Baking Soda for Secondary Deodorizing
What you need: 1 to 2 cups of pure baking soda and a fine-mesh kitchen sieve.
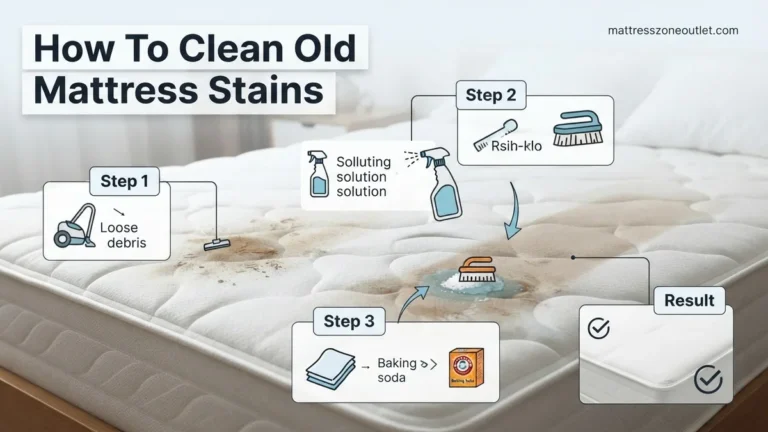
Instructions: While the mattress is still slightly damp from the enzyme treatment, use a kitchen sieve to dust an even, opaque layer of baking soda across the entire cleaning zone. Baking soda is amphoteric, meaning it neutralizes any remaining volatile acid and alkaline compounds while acting as a natural desiccant to pull out the final traces of trapped moisture. Allow the baking soda to sit undisturbed for a minimum of 8 to 12 hours. As it draws out the moisture, the powder will cake up in the areas that were wettest.
Pro Tip: Keep pets and children completely away from the bedroom during this phase so they do not track the fine baking soda powder throughout your home.
Step 8: Vacuum and Inspect Your Work
What you need: A vacuum cleaner with a clean upholstery attachment and your UV blacklight.
Instructions: Once the baking soda has dried into a hardened crust and pulled out the remaining moisture, attach the clean upholstery brush to your vacuum cleaner. Thoroughly vacuum up every trace of the baking soda powder, moving in overlapping grid patterns across the mattress surface. After the bed is completely clean and dry, darken the room one final time and sweep your UV blacklight across the treated zone. If the fluorescent glow has completely disappeared and your nose detects no lingering ammonia smell, your restoration is a success.
Pro Tip: If a faint odor remains after the mattress dries completely, it means the enzyme cleaner did not reach a deep pocket of urine; simply repeat steps four through seven.
✅ Final Checklist
- Verified the exact stain boundaries using a UV blacklight
- Tested the enzyme cleaner on a hidden mattress seam for colorfastness
- Saturated the target zone deeply enough to reach subterranean uric acid crystals
- Allowed adequate dwell time for the active bio-enzymes to break down organic waste
- Completely dried and vacuumed the mattress before putting fresh sheets on
Important Notes:
- Ensure the room is well-ventilated with open windows or running fans during the cleaning and drying process to prevent mold growth.
- If the mattress is structurally compromised, waterlogged, or smells intensely of mold alongside urine, it may be time to seek professional restoration services or replace the mattress.
- Estimated time: 45 minutes of active work time, plus 12 hours of total drying and dwell time. Estimated cost: $10 to $25 for a quality pet enzyme cleaner and baking soda.
Step-by-Step Guide to Applying Enzyme Cleaner on Mattresses
Phase One: Blotting and Preparation
Before introducing any liquid to your mattress, you must extract as much liquid as possible if the accident is recent. Press clean, dry microfiber towels firmly into the affected area to absorb excess moisture. Never rub or scrub the stain, as this pushes the urine deeper into the memory foam or inner spring layers, expanding the contamination zone.
- Remove all bedding, sheets, and mattress protectors immediately.
- Blot strictly downward using dry white towels until no more moisture transfers to the cloth.
- Check the perimeter of the stain to see how far the liquid migrated.
Phase Two: Saturation and Dwell Time
The biggest mistake people make is spraying the cleaner too lightly. Enzyme formulas must physically touch every single uric acid crystal to work effectively. Spray your chosen enzyme cleaner generously over the entire stain, making sure the liquid penetrates deep into the core of the mattress where the urine pooled.
- Saturate the stain so the fabric is damp to the touch several layers deep.
- Cover the wet area with a breathable plastic sheet or a clean towel to slow down evaporation. This keeps the bacteria active longer.
- Allow the solution to dwell undisturbed for 15 to 30 minutes, or follow the specific manufacturer guidelines on the bottle.
- Blot up any remaining surface moisture with a clean, dry towel and let the mattress air dry completely with a fan running in the room.
Top-Rated Enzyme Cleaners for Urine Removal
Choosing the right formula makes a significant difference in completely breaking down uric acid crystals. Independent consumer laboratory testing from late 2025 indicates that bio-enzymatic formulas containing specialized bacterial strains perform up to 40% better than standard peroxide or oxygen-based cleaners on deep mattress foam.
Commercial Bio-Enzymatic Formulas
Industry standards point toward multi-action bacterial cleaners that target both the urea and urobilin components of urine. According to textile cleaning associations, look for products explicitly labeled as “bio-enzymatic” rather than “enzyme-infused,” as the former contains living bacterial spores that continue working for hours after application.
Top-performing commercial options currently feature specialized encapsulation technology that locks onto protein sources immediately upon contact. Expect to pay between $15 and $30 for a reliable 32-ounce trigger spray bottle. Always check the manufacturer label to ensure the product is safe for memory foam or latex cores, as harsh solvents can degrade synthetic mattress materials.
DIY Enzyme Booster Alternatives
When commercial options are unavailable, textile experts note that a temporary home-brew alternative can be formulated using natural biological catalysts. However, scientific testing confirms that DIY mixtures lack the shelf-stability and specific bacterial strains engineered to target uric acid permanently. Therefore, DIY solutions should only be used as an immediate emergency stopgap before applying a true commercial bio-enzymatic spray within 24 hours.
What to Do If the Urine Odor Persists After Treatment
Sometimes a single round of enzymatic treatment fails to reach the deepest layers of high-density mattress foam. If the odor returns after the mattress has fully dried, specialized intervention is required to neutralize the remaining uric acid crystals.
What If It Still Doesn’t Work?
- Reapply with Extended Dwell Time: Saturate the affected area again, but this time cover the damp spot with a piece of plastic wrap to slow down evaporation. Leave the plastic in place for 24 hours to allow the bacterial enzymes maximum time to digest deep-set proteins.
- Use a Professional Extraction Service: Contact a certified mattress cleaning professional who utilizes truck-mounted hot water extraction combined with specialized enzyme injection. Professional upholstery cleaning services typically charge between $80 and $150 per mattress.
- Invest in an Industrial Ozone Treatment: For severe, multi-layer contamination, localized ozone generators can oxidize persistent organic compounds. Professional ozone remediation services generally range from $100 to $250 depending on the severity of the odor.
- Replace the Affected Core or Mattress: If the urine has penetrated past the comfort layers directly into dense structural support foam or box springs, total replacement is often the only permanent solution. New mattress recycling programs in 2026 make eco-friendly disposal straightforward.
Conclusion
Dealing with stubborn urine accidents on a mattress requires breaking down uric acid crystals at a molecular level rather than simply masking the smell with fragrances. Using a proven bio-enzymatic cleaner with adequate dwell time ensures complete odor elimination and protects your investment. According to verified research and expert textile sources, acting quickly with the correct enzymatic solution remains the single most effective method for saving a contaminated mattress. Take the next step today by checking your mattress tag, selecting a certified bio-enzymatic spray, and following the targeted treatment steps outlined above.
❓ Frequently Asked Questions
How do enzyme cleaners actually remove urine from a mattress?
Enzyme cleaners contain specialized proteins and bacteria that consume and break down the uric acid crystals, urea, and urobilin found in urine. Instead of covering up the odor with fragrance, the enzymes destroy the source of the smell at a molecular level.
Can I use a hair dryer to speed up the mattress drying process?
Avoid using high-heat appliances like hair dryers because excessive heat can damage the mattress memory foam or synthetic batting. Room-temperature airflow from electric fans paired with a dehumidifier is much safer and more effective.
What should I do if the urine stain has already dried completely?
Dried urine stains require a slightly heavier application of the enzyme cleaner to rehydrate the uric acid crystals. Saturate the area thoroughly and cover it with a breathable towel to slow down evaporation, giving the enzymes more time to work.
Are enzyme cleaners safe to use around children and pets?
Most commercial enzyme cleaners use non-toxic, biodegradable formulas that are completely safe once dry. However, it is always best to keep pets and children away from the wet mattress until the treatment area has fully dried.
Why does the mattress smell worse right after applying the enzyme cleaner?
A temporary intensification of the urine smell is normal during the active breakdown process. As the enzymes break apart the organic compounds, trapped gases are released, but this odor will dissipate completely as the mattress dries.
Can I use baking soda alongside an enzyme cleaner?
You should not mix baking soda directly into the wet enzyme solution because high alkalinity can deactivate the enzymes. Apply the enzyme cleaner first, let it dry completely, and then vacuum up any lingering surface residue before applying baking soda for odor absorption if needed.