How to Remove Mold From Mattress Step-by-Step Fix 2026
Knowing how to remove mold from a mattress requires immediate action using specialized solutions like rubbing alcohol or hydrogen peroxide to kill spores. Proper safety gear and thorough drying are essential to prevent health risks and stop mold from returning.
Removing mold from your mattress requires immediate, aggressive action using a targeted cleaning solution of equal parts rubbing alcohol and warm water, followed by complete, rapid drying to stop spores from spreading. Because you spend roughly a third of your life sleeping in direct contact with this surface, ignoring visible discoloration or that unmistakable musty odor poses severe respiratory risks that you cannot afford to brush aside.
By 2026, indoor climate control standards have evolved, yet high humidity and poor bedroom ventilation still catch many homeowners off guard. Dealing with this issue safely means protecting your respiratory system with the right gear, killing the fungus at the root without destroying your bed, and knowing the critical threshold where DIY cleaning stops and throwing the mattress away becomes your only healthy option.
Key Takeaways
- Wear gloves, eye protection, and an N95 mask before handling a moldy mattress.
- Vacuum the affected area thoroughly with a HEPA filter vacuum to capture loose spores.
- Mix equal parts rubbing alcohol and warm water to effectively kill surface mold.
- Dry the mattress completely in direct sunlight or with fans to prevent moisture retention.
- Discard memory foam mattresses if mold has deeply penetrated the internal core.
How to Diagnose Mold on a Mattress and Assess the Damage
Identifying Surface Spots Versus Deep Penetration
You need to check both the top sleeping surface and the underside resting against your bed frame or floor. Surface mold caused by localized humidity usually presents as small green, black, or white fuzzy patches that sit entirely on the fabric layer. If you press firmly on the spot and the discoloration smears or stays isolated to the outer upholstery, you have a fighting chance at saving the bed.
When to Immediately Toss Your Mattress
Certain structural red flags mean you must abandon DIY cleaning and discard the mattress immediately for your health:
- Extensive Coverage: If mold covers more than twenty percent of the total mattress surface area.
- Memory Foam Saturation: If you are dealing with a memory foam or latex core, which absorbs moisture deeply unlike traditional innersprings.
- Persistent Odor: If a heavy, damp mildew smell remains long after the surface has dried entirely.
- Health Vulnerabilities: If anyone sleeping in the bed suffers from severe asthma, compromised immunity, or chronic mold allergies.
Master Mattress Mold Removal in 8 Simple Steps
Discovering mold on your bed can be alarming, but acting quickly can save your sleep surface and protect your health. This comprehensive walkthrough guides you through safely identifying, treating, and preventing mold growth on various mattress types without causing permanent fabric damage.
Step 1: Move Outdoors and Protect Yourself
What you need: N95 respirator mask, heavy-duty rubber gloves, protective goggles, and a well-ventilated outdoor space or large room with open windows and running fans.
Instructions: Before handling a moldy mattress, gear up with your personal protective equipment to avoid inhaling microscopic spores that can trigger allergic reactions or respiratory issues. Carefully strip off all bedding, pillows, and mattress covers, sealing them immediately in plastic bags to prevent cross-contamination. With the help of a partner, carry the mattress outside on a dry, sunny day if possible. Sunlight acts as a natural inhibitor to fungal growth, making the outdoors the absolute best environment for this remediation process.
Pro Tip: Never tackle mold inside a closed, unventilated bedroom, as agitating the mattress will release millions of spores into your living space.
Step 2: Vacuum the Entire Surface Thoroughly
What you need: Vacuum cleaner equipped with a HEPA filter attachment and a brush head.
Instructions: Attach the HEPA-filter nozzle to your vacuum to trap microscopic spores rather than blowing them back into the air. Systematically vacuum every square inch of the mattress, paying hyper-focused attention to crevices, tufts, seams, and piping where mold spores love to hide. Work in overlapping grid patterns from the top of the mattress down to the bottom. Once you finish vacuuming both sides, immediately empty the vacuum canister directly into an outdoor trash bin or seal the disposable vacuum bag tightly and discard it outside.
Pro Tip: Wash your vacuum’s brush attachment thoroughly in hot, soapy water immediately after use to prevent spreading residual spores to other furniture.
Step 3: Mix Your Cleansing Solution
What you need: Equal parts isopropyl alcohol (rubbing alcohol) and warm water, a clean spray bottle, and mild dish soap.
Instructions: Create a gentle yet effective cleaning solution by combining equal parts of 70% isopropyl alcohol and warm water inside your spray bottle. Add just one or two drops of mild liquid dish soap to help break down surface oils. Isopropyl alcohol is preferred over plain water or harsh bleach because it kills mold spores effectively while drying rapidly, minimizing the risk of trapping excess moisture deep inside the foam or inner springs of your mattress.
Pro Tip: Avoid using pure bleach on memory foam or colored fabric, as it causes severe chemical degradation and permanent discoloration.
Step 4: Test a Small Hidden Area
What you need: Clean white microfiber cloth, your mixed cleaning solution.
Instructions: Dip your microfiber cloth into the cleaning solution or spritz a tiny, out-of-sight corner on the underside or edge of the mattress. Gently dab the fabric and hold it there for roughly thirty seconds. Blot the area dry with a separate clean towel and inspect the spot closely. Verify that the fabric color has not bled, faded, or warped. This crucial patch test ensures that your chosen cleaning agent will not permanently ruin your mattress material before you commit to treating the visible mold patches.
Pro Tip: Always use a white or light-colored cloth for patch testing to accurately detect if fabric dye is transferring.
Step 5: Apply the Solution and Scrub Gently
What you need: Spray bottle with cleaning solution, soft-bristled brush or clean white cloth.
Instructions: Lightly mist the mold-affected areas with your alcohol and water solution. Be careful not to soak the mattress; you want the surface damp, not saturated. Using your soft-bristled brush or microfiber cloth, work in gentle, circular motions starting from the outer perimeter of the mold spot and moving inward. This circular technique prevents the spores from spreading further across the clean fabric. You should notice the mold lifting away from the surface fibers almost immediately as you work the solution into the fabric.
Pro Tip: Never scrub aggressively or use stiff-bristled brushes, as this will fray delicate ticking fabric and push mold roots deeper into the mattress layers.
Step 6: Wipe Away Residue and Excess Moisture
What you need: Clean dry towels, fresh warm water in a separate bowl.
Instructions: Take a fresh microfiber cloth, dampen it with plain warm water, and wring it out completely until it is barely damp. Gently wipe down the treated areas to remove any residual alcohol, loosened mold debris, and soap film. Immediately follow this by pressing clean, dry towels firmly against the wet spots to absorb as much surface moisture as possible. Apply body weight to the towels to press deep into the padding and pull out hidden liquid.
Pro Tip: Change your wiping cloth frequently to ensure you are lifting mold away rather than smearing it back onto clean sections of the mattress.
Step 7: Accelerate Drying with Airflow and Sunlight
What you need: Electric box fans, hair dryer (on a cool setting), and natural sunlight.
Instructions: Leave the mattress outside in direct sunlight for at least four to six hours, flipping it midway through to dry both sides evenly. If outdoor drying is completely impossible, prop the mattress upright against a sunny indoor window inside a room with running ceiling fans and oscillating floor fans blowing directly across its surface. You can use a hair dryer strictly on a cool setting to speed up stubborn damp spots. The mattress must be 100% bone dry before you even consider putting it back on your bed frame.
Pro Tip: Even if a mattress feels dry to the touch on the outside, inner foam layers retain moisture for days. Wait an extra 24 hours to be completely safe.
Step 8: Deodorize and Prevent Future Growth
What you need: Baking soda and a fine-mesh sifter.
Instructions: Once the mattress is completely dry, use a sifter to dust a generous, even layer of plain baking soda across the entire top surface. Baking soda neutralizes any lingering musty odors and absorbs remaining microscopic moisture vapor. Leave the baking soda sitting undisturbed for a minimum of 8 to 12 hours. Finally, take your vacuum cleaner with a clean HEPA attachment and thoroughly vacuum up every trace of baking soda. Make sure to invest in a waterproof, breathable mattress protector moving forward to prevent future moisture accumulation.
Pro Tip: Mix a few drops of tea tree oil into your baking soda for its natural, long-lasting antifungal and antibacterial properties.
✅ Final Checklist
- All visible mold spots, staining, and musty odors have been completely eliminated.
- The mattress has been thoroughly vacuumed with a HEPA filter to remove residual spores.
- The mattress is 100% dry throughout all internal padding layers with zero dampness remaining.
- A waterproof mattress protector has been installed to safeguard against future moisture and mold.
Important Notes:
- Always wear proper respiratory protection, as mold exposure can cause severe health complications for individuals with asthma or compromised immune systems.
- If mold has penetrated deep into the memory foam core or covers more than 20% of the mattress surface, discard the mattress professionally and purchase a replacement.
- Estimated time required: 1 to 2 days (primarily for drying). Cost range: $5 to $15 for basic supplies like rubbing alcohol and baking soda.
Why Mattresses Grow Mold and Common Environmental Causes
Trapped Body Moisture and Temperature Diffs
Every single night, your body releases up to a pint of sweat through perspiration and respiration. Without proper ventilation underneath, that moisture travels straight down through the comfort layers and hits a cold solid surface like a platform bed or the floor. This creates a textbook microclimate of trapped humidity and warmth that allows dormant mold spores floating in your bedroom air to germinate within 24 to 48 hours.
External Environmental Factors in 2026 Homes
Modern tightly sealed homes designed for energy efficiency frequently trap indoor humidity if air circulation is neglected. Common triggers include:
- High Relative Humidity: Indoor baseline humidity levels consistently exceeding 60 percent during transitional weather seasons.
- Direct Floor Placement: Placing mattresses directly on hardwood or carpeted floors without a slatted bed frame to allow airflow underneath.
- Unaddressed Leaks: Slow window frame leaks, high roof humidity, or accidental liquid spills that went completely unnoticed deep inside the core.
Step-by-Step Guide on How to Remove Mold From a Mattress Safely
Tackling mattress mold requires methodical execution to prevent spores from spreading into your bedroom ecosystem. According to the United States Environmental Protection Agency (EPA), porous items require careful management during remediation. Here is the exact protocol to follow in 2026:
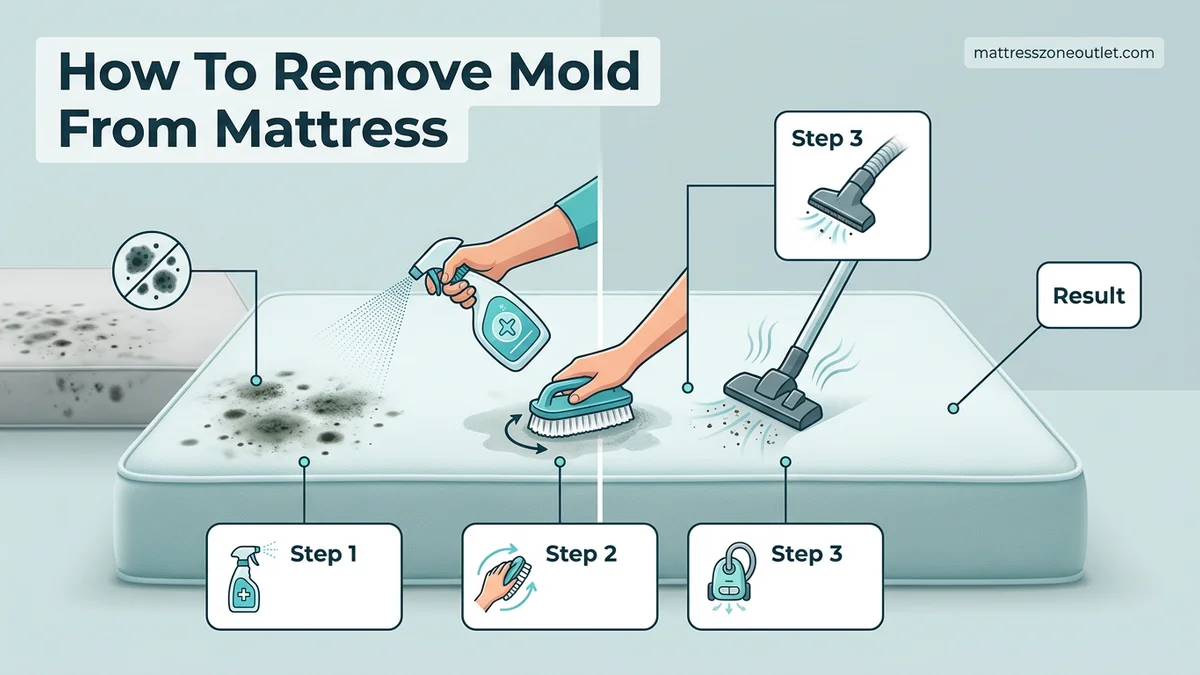
- Vacuum thoroughly: Use a HEPA-filtered vacuum cleaner over the entire mattress surface to capture loose mold spores and prevent airborne dispersion. Empty the vacuum canister immediately into an outdoor trash bin.
- Apply the cleaning solution: Spray your chosen solution—such as a 1:1 mixture of rubbing alcohol and warm water, or a specialized enzymatic cleaner—onto the affected area. Avoid oversaturating the fabric, as excess moisture fuels future fungal growth.
- Scrub gently: Use a soft-bristled brush to gently agitate the solution into the fabric. Work from the outside edges toward the center of the mold patch to prevent the spores from spreading outward.
- Wipe and rinse: Blot the area with a clean microfiber cloth dampened with plain water to lift residual mold and cleaning agents. Press down firmly to extract as much liquid as possible.
- Accelerate drying: Position high-velocity electric fans and a dehumidifier facing the mattress in a well-ventilated room. Complete drying should occur within 4 to 6 hours to inhibit new spore germination.
What to Do If Cleaning Fails and When to Throw Your Mattress Out
Surface cleaning is ineffective if fungal hyphae have penetrated deep into the internal comfort layers and memory foam core. Sleep hygiene and indoor air quality standards dictate strict replacement thresholds for compromised bedding materials.
Recognizing Beyond-Repair Damage
You must discard your mattress immediately if the mold covers an area larger than 24 square inches, emits a persistent musty odor despite multiple cleaning cycles, or returns within two weeks. Furthermore, toxic black mold varieties (such as Stachybotrys chartarum) demand total disposal to protect respiratory health.
Professional Intervention and Costs
If you own an expensive specialty mattress and want expert assessment before disposal, certified indoor environmentalists or professional upholstery restoration services can evaluate the damage. Professional deep sanitization services typically range from $150 to $350, though reputable technicians will refuse service if the internal core is structurally compromised.
Conclusion
Dealing with mattress mold demands swift, decisive action to safeguard your respiratory health and extend the lifespan of your bedroom investment. By utilizing targeted cleaning solutions and ensuring rapid drying times, surface outbreaks can be managed effectively. According to verified research and expert sources from leading sleep and indoor air quality institutions, preventative humidity control remains the ultimate defense against recurring fungal infestations. Take the next step today by inspecting your bedroom environment and investing in a quality dehumidifier to keep relative humidity levels strictly below 50 percent.
❓ Frequently Asked Questions
What is the best cleaning solution for how to remove mold from a mattress?
A mixture of equal parts rubbing alcohol and warm water works best because it kills spores without adding excessive moisture. Hydrogen peroxide can also be used on white fabrics, but it may cause bleaching on colored materials.
How can I prevent mold from growing on my mattress again?
Keep bedroom humidity below 50 percent, use a waterproof mattress protector, and ensure your bed has adequate airflow by using a slatted bed frame instead of placing it directly on the floor.
How do I know if the mold has penetrated too deep to clean?
If the mold covers a large surface area, emits a persistent musty odor even after cleaning, or has penetrated deep inside memory foam or latex cores, the mattress is unsalvageable and must be discarded.
Should I vacuum a moldy mattress before applying a cleaning solution?
Yes, vacuuming with a HEPA filter vacuum removes loose surface spores and debris. Always empty the vacuum canister immediately outside your home to avoid spreading spores indoors.
Can sunlight help kill mold on a mattress?
Ultraviolet rays from direct sunlight help kill mold spores and naturally dry out lingering moisture. If weather permits, dragging the mattress outside on a sunny, low-humidity day is highly beneficial.
What health symptoms are caused by sleeping on a moldy mattress?
Exposure to mattress mold often causes chronic coughing, sneezing, nasal congestion, skin irritation, and worsened asthma symptoms, particularly for sensitive individuals.