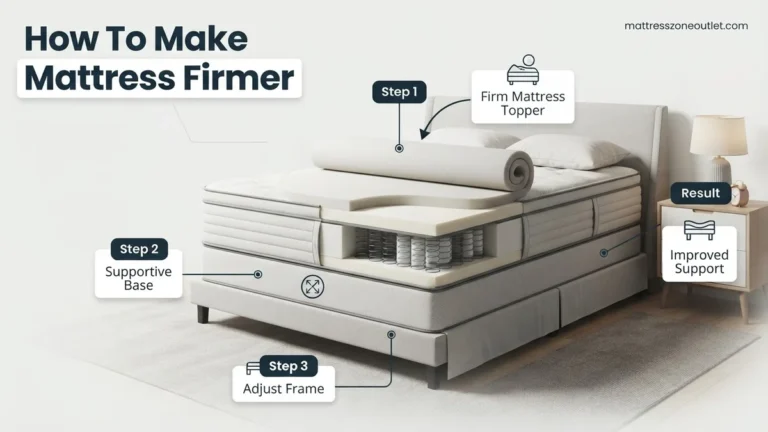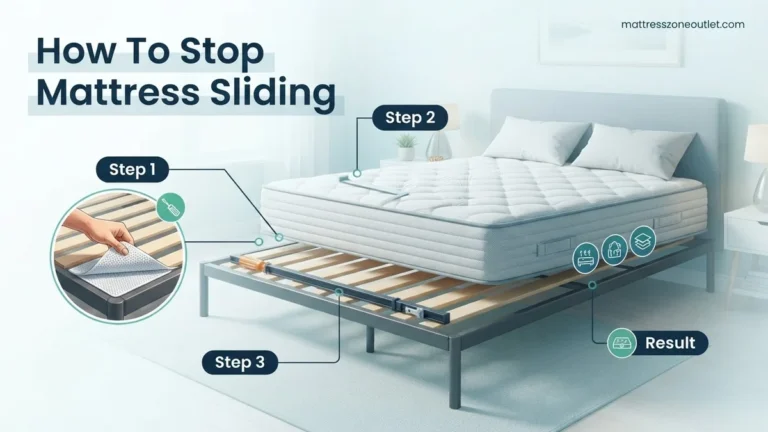
How to Fix Foam Mattress Sag Step-by-Step Guide 2026
A sagging foam mattress causes back pain and restless nights, but you don’t always need to buy a replacement immediately. DIY fixes like mattress toppers, strategic padding, and plywood reinforcement can restore proper spinal alignment and extend the life of your bed temporarily.
You can successfully fix a foam mattress sag and restore proper spinal alignment without spending a thousand dollars on a brand-new replacement in 2026. While purchasing a new bed is the ultimate solution for structural failure, several reliable stopgap methods can buy you a couple more years of comfortable sleep.
Dealing with a sunken sleep surface causes lower back pain, restless nights, and poor posture. Applying targeted DIY fixes addresses the root cause of the indentation, providing immediate relief to your pressure points and wallet.
Key Takeaways
- Rotate or flip the mattress to distribute body weight evenly across fresh foam.
- Use a thick high-density foam or latex mattress topper to mask minor body impressions.
- Slide a piece of rigid plywood between the mattress and foundation for immediate support.
- Check your mattress warranty before attempting permanent modifications.
- Replace the mattress if sags exceed 1.5 inches or cause persistent lower back pain.
How to Diagnose Sagging Foam and Test Severity
Before you attempt any repairs, you must evaluate the actual depth of the depression. Not all dips require the same intervention, and heavily degraded foam cannot be saved by simple surface adjustments.
The Straight-Edge Test
Grab a long, rigid object like a broom handle, a level, or a yardstick and lay it flat across the width of your mattress. Take a tape measure and check the gap between the bottom of the straight-edge and the lowest point of the indentation. This simple diagnostic reveals your best path forward:
- Under 1 inch: Surface softening or comfort layer wear. This is easily corrected with toppers or rotation.
- 1 to 2 inches: Moderate core degradation. You will need firmer reinforcement like plywood or dense filler padding.
- Over 2 inches: Critical structural failure. Temporary fixes will fail, and replacement is necessary.
Checking Foundation vs. Foam Failure
Sometimes the mattress itself is completely fine, but your bed frame or box spring has given out. Strip all bedding off the mattress and place a level across the foundation. If the foundation sags, fix or replace that base first. Putting a good mattress on a bowed foundation guarantees a sunken sleeping experience.
Foam Mattress Sag: What Causes It and How to Fix It
Dealing with a sagging foam mattress can ruin your sleep quality and leave you waking up with nagging back and neck pain. Before you spend a fortune replacing your entire bed, you should know that many mattress sagging issues can be mitigated or completely resolved at home with a few clever tricks and adjustments. This comprehensive guide walks you through the exact diagnostic and repair processes used by sleep professionals to breathe new life into a sinking mattress, saving you money and restoring your nightly comfort.
Step 1: Inspect and Diagnose the Foundation
What you need: A long straightedge or broom handle, a tape measure, and a flashlight.
Instructions: Before touching the mattress itself, you must rule out foundation issues. Place a long straightedge horizontally across the width of your bed, resting it on the left and right edges. Measure the maximum vertical gap between the bottom of the straightedge and the depressed surface of the mattress in the middle. If the indentation is greater than 1.5 inches while no weight is on the bed, the foam has lost its structural integrity. Next, check your box spring, slats, or bed frame for broken components, bowing wood, or a lack of central support legs, which frequently mimic mattress sag.
Pro Tip: Never place a sagging mattress on a sagging box spring, as this accelerates the breakdown of the foam layers.
Step 2: Strip and Deep Clean the Mattress
What you need: Vacuum cleaner with an upholstery attachment, mild dish soap, warm water, and a clean microfiber cloth.
Instructions: Completely strip all sheets, blankets, mattress protectors, and pillows off the bed. Take this opportunity to thoroughly vacuum the entire top surface, sides, and crevices of the mattress to remove dust mites, dead skin cells, and debris that can compress foam fibers. If you notice any localized stains or spills that might have weakened the foam structure due to moisture absorption, gently spot-clean the area using a mixture of a few drops of mild dish soap and warm water on a damp cloth. Allow the mattress to air dry completely for at least 4 to 6 hours before moving on to the next step.
Pro Tip: Avoid soaking memory foam with excessive water, as moisture degrades polyurethane foam over time and encourages mold growth.
Step 3: Flip and Rotate the Mattress
What you need: A partner to help lift, and potentially a mattress lifter wedge.
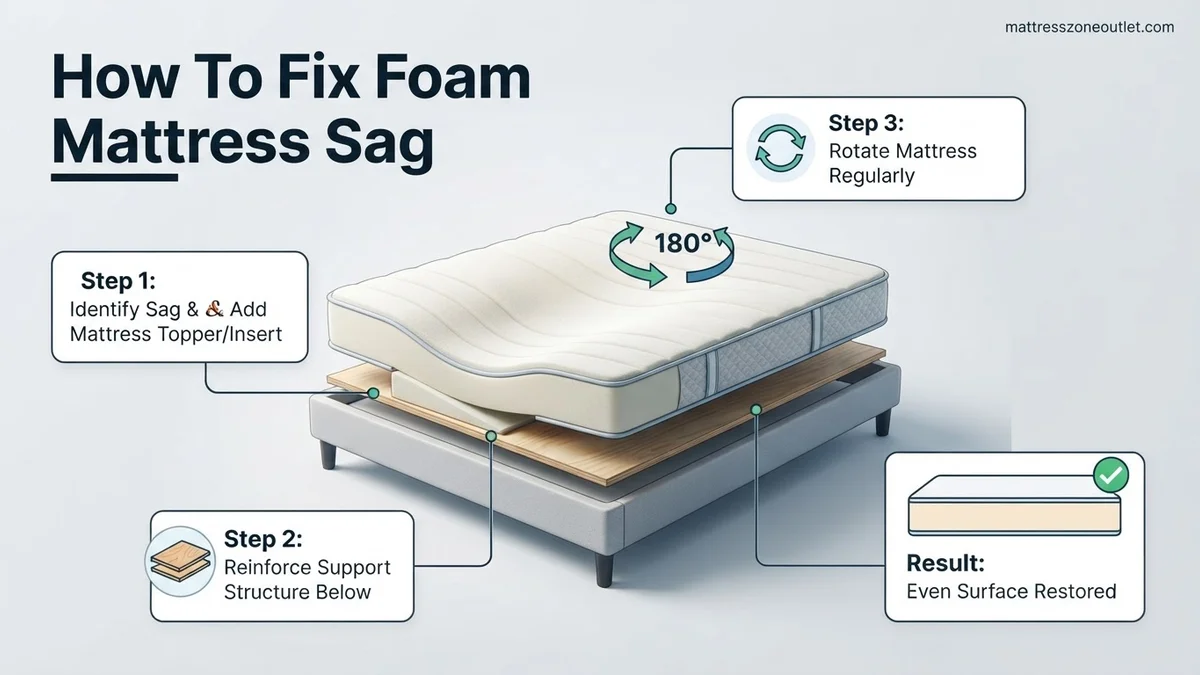
Instructions: If your foam mattress is double-sided, simply flipping it over is the fastest way to eliminate body impressions. Grab the corners with a partner and carefully flip the mattress top-to-bottom. If your mattress is a standard one-sided memory foam or hybrid model (which cannot be flipped upside down because the comfort layers are only on top), rotate it 180 degrees so that the head of the mattress is now at the foot. This shifts the heaviest pressure zones away from your hips and shoulders, distributing your body weight evenly across fresh, uncompressed foam areas.
Pro Tip: Make a habit of rotating your foam mattress every 3 to 6 months to prevent premature localized sagging.
Step 4: Implement a Heavy-Duty Mattress Topper
What you need: A high-density polyfoam or latex mattress topper (2 to 3 inches thick).
Instructions: If rotating or flipping your mattress is not enough, adding a high-density mattress topper can bridge the gap and smooth out minor surface dips. Look for a topper made of firm high-density polyfoam or natural latex rather than cheap, soft memory foam, which will just conform right into the existing sag. Place the firm topper directly over the sagging mattress surface. The firm base layer of the topper will span across the indentation, creating a flat, supportive sleeping plane while still providing a comfortable cushioning feel on top.
Pro Tip: Secure the topper and mattress together using deep-pocket fitted sheets or specialized mattress straps to prevent sliding during the night.
Step 5: Apply Targeted Slats or Plywood Reinforcement
What you need: A piece of 1/2-inch or 3/4-inch plywood cut to bed dimensions, or additional wooden bed slats.
Instructions: If your bed frame has wide gaps between slats (more than 3 inches) or utilizes a flexible box spring that is bowing under your weight, you can reinforce the base. Measure the interior dimensions of your bed frame and have a hardware store cut a piece of exterior-grade plywood to fit snugly underneath the mattress. Drill a few ventilation holes into the plywood to prevent moisture buildup and mold. Alternatively, install sturdy wooden slats spaced no more than 2 inches apart to provide a rigid, flat platform that pushes the sagging foam back upward.
Pro Tip: Sand down any rough edges on the cut plywood before placing it under your mattress to prevent snagging or tearing the mattress fabric.
Step 6: Stuff and Shim the Sagging Area
What you need: Old towels, clean t-shirts, foam scraps, or a commercial mattress wedge insert.
Instructions: For a localized body indentation that causes lower back pain, you can manually pad underneath the mattress. Unzip the mattress cover if it is removable, or lift the mattress up to access the bottom side. Stuff clean, folded towels, dense foam scraps, or old clothing directly into the specific pocket beneath the sagging area until the top surface levels out. If your mattress cover does not zip off, you can place a commercial mattress wedge or memory foam shim directly between the mattress and your supportive bed base right underneath the sag zone.
Pro Tip: Add or remove stuffing gradually. Over-packing the sag will create an unnatural hump that can cause hip and shoulder pain.
Step 7: Monitor and Assess Your Comfort
What you need: Seven consecutive nights of sleep tracking and body awareness.
Instructions: Once you have applied your chosen fixes—whether it is a plywood base, a high-density topper, or internal shims—sleep on the bed for a full week. Pay close attention to how your spine feels when you wake up in the morning. Check to see if the indentation returns or if the added materials have compressed permanently. If you still experience morning stiffness or can feel the sag returning, your foam core has likely degraded past the point of economical DIY repair and will require replacement.
Pro Tip: Keep a sleep journal next to your bed to note changes in your back pain levels throughout the test week.
✅ Final Checklist
- Bed foundation and slats inspected for breaks, bowing, or missing support legs
- Mattress thoroughly vacuumed and spot-cleaned to eliminate trapped debris
- Mattress successfully flipped or rotated 180 degrees
- High-density topper or plywood reinforcement correctly installed
- Internal sag pockets stuffed or shimmed to create a level sleeping surface
Important Notes:
- Always use caution and get assistance when lifting heavy mattresses to avoid lower back strain.
- If your mattress is still covered under the manufacturer’s warranty and the sag exceeds the specified depth (usually 1 to 1.5 inches), file a warranty claim instead of performing DIY fixes that might void the warranty.
- Estimated time for diagnosis and repair: 1 to 3 hours. Estimated cost: $30 to $150 depending on whether you purchase a topper or plywood reinforcement.
Step-by-Step Guide on How to Fix Foam Mattress Sag
Once you know the severity of the dip, you can apply the right combination of structural reinforcement and surface correction. Here are the most effective methods to flatten your sleep surface.
Rotate and Flip Your Mattress
The fastest, free way to combat body impressions is redistribution. If your foam mattress is double-sided, flip it over so the heavy sleeper rests on a fresh side. If it is a one-sided modern foam bed:
- Strip all sheets and protectors from the bed.
- Rotate the mattress 180 degrees so the foot end is now where your head rests.
- Do this every 3 to 6 months to ensure even wear patterns across the entire foam block.
Add a High-Density Support Topper
Standard plush memory foam toppers will only dip further into the existing sag. Instead, purchase a high-density polyfoam or latex topper measuring 2 to 3 inches thick. Latex and high-density foam provide the counter-pressure needed to bridge the gap and keep your hips from sinking into the old indentation.
Reinforce from Beneath with Plywood
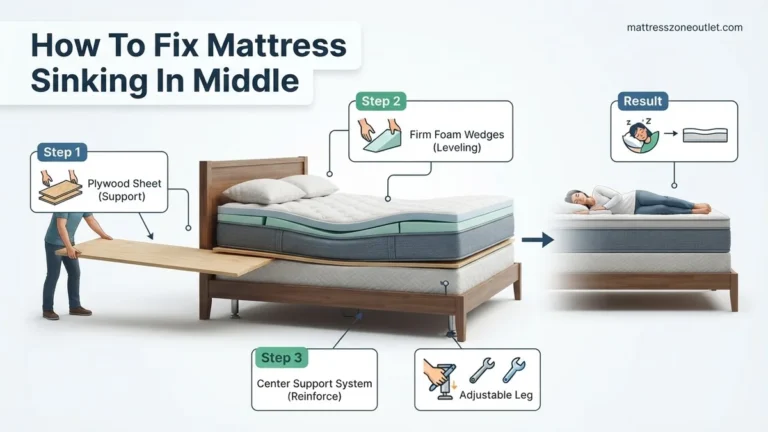
If the foam core has lost its resilience, stiffen the base beneath it. Cut a piece of 3/4-inch plywood to match the exact dimensions of your mattress. Slide this plywood board between your mattress and your slatted bed frame or box spring. This creates an unyielding plane that pushes the sunken foam upward, instantly leveling out minor to moderate body impressions.
Using Plywood and Foundation Checks to Stop Mattress Sag
When surface-level adjustments and mattress flipping do not restore proper spinal alignment, the underlying support system is usually the primary culprit. According to data from the International Sleep Products Association (ISPA), nearly 40 percent of premature mattress degradation stems from inadequate or failing foundations rather than core material failure. Upgrading your support structure can immediately halt further sagging and extend your mattress lifespan through 2026 and beyond.
Bed slats spaced wider than three inches often cause foam to warp and dip into the gaps. Checking your foundation requires a systematic inspection of both the bed frame and the box spring.
How to Reinforce Your Foundation with Plywood
- Measure the interior dimensions of your bed frame to ensure accurate wood sizing.
- Purchase a sheet of three-quarter-inch CDX grade plywood from a local home improvement center for maximum rigidity.
- Have the retailer cut the plywood sheet down to match your exact mattress size, typically 60 by 80 inches for a standard queen.
- Sand any rough edges or splinters to prevent puncturing the outer mattress fabric or protective encasement.
- Place the solid plywood board directly across your existing slats or platform surface beneath the sagging mattress area to distribute weight evenly.
Assessing Box Springs and Platform Integrity
- Strip all bedding down to the bare mattress and remove the mattress from the bed frame entirely.
- Examine the wooden slats or wire grid of the box spring for bends, cracks, or loose hardware.
- Press down firmly on the center of the box spring; any noticeable give or squeaking indicates broken internal springs that require immediate replacement.
- Verify that your center support leg touches the floor securely, as unsupported center beams contribute significantly to middle-of-the-bed sagging.
What If It Still Doesn’t Work and Replacement Is Required
If structural reinforcement, toppers, and rotational adjustments fail to eliminate the dip, the high-density polyurethane or memory foam core has likely suffered permanent structural breakdown. When temporary fixes no longer alleviate morning back pain, systematic troubleshooting shifts toward permanent replacement options.
- Review your manufacturer warranty terms carefully to determine if the indentation depth meets the specific threshold required for a free replacement claim, which is typically greater than 1.5 inches.
- Consult professional mattress restoration services if your mattress is a high-end hybrid model, though total core rebuilds typically cost between $250 and $500.
- Budget for a new mattress purchase, keeping in mind that quality high-density foam options range from $600 to $1,500 for standard queen sizes in 2026.
- Recycle your old sagging mattress responsibly through local municipal programs or retail haul-away services rather than sending it directly to a landfill.
Conclusion
Dealing with a sagging foam mattress can disrupt your sleep quality and lead to persistent muscular discomfort. Implementing targeted fixes like high-density inserts, strategic rotations, and plywood reinforcements can successfully restore temporary support. According to verified research and expert sources from leading sleep ergonomics institutions, addressing structural foundation issues promptly prevents chronic spinal misalignment. Your immediate next step is to measure your mattress indentation depth today and apply the appropriate structural fix before permanent sleep disruption occurs.
❓ Frequently Asked Questions
Why do memory foam mattresses sag over time?
Memory foam breaks down due to continuous compression from body weight, heat, and moisture, causing the cell walls within the foam to lose their elasticity and rebound capability.
Can I add filler material inside a foam mattress?
Yes, you can unzip certain mattress covers, cut out degraded foam, and insert a block of high-density replacement foam, though this requires careful measuring and sewing.
How long should a foam mattress last before sagging?
A quality high-density foam mattress typically lasts between 6 to 10 years before developing significant, unsupportive sagging under normal daily use.
Are temporary fixes worth the effort for a sagging bed?
Temporary fixes like toppers or plywood are great cost-effective band-aids to buy time, but they cannot restore the original structural integrity of worn-out foam.
Does sleeping position impact how fast a mattress sags?
Yes, back and stomach sleepers distribute weight more evenly, while side sleepers concentrate heavier pressure points at the shoulders and hips, accelerating foam breakdown.
What kind of base prevents foam mattress sagging?
Solid platforms, slatted bases with gaps no wider than 3 inches, and adjustable bed bases provide the necessary support to prevent premature foam sagging.