How to Deep Clean Memory Foam Mattress Step-by-Step 2026
Knowing how to deep clean a memory foam mattress is essential for removing embedded sweat, stains, and odors without destroying the delicate foam material. This guide details a safe, low-moisture cleaning process that prevents mold growth and extends the lifespan of your mattress.
Deep cleaning a memory foam mattress requires a delicate balance of moisture control and targeted stain removal because high heat and excessive water can permanently destroy the porous foam structure. To safely sanitize and eliminate stubborn odors without ruining your bed in 2026, you must avoid soaking the material and rely instead on gentle enzymatic cleaners, mild dish soap, and thorough air drying.
Your memory foam mattress absorbs dead skin cells, body oils, sweat, and allergens nightly, creating a breeding ground for bacteria and dust mites that standard surface wiping cannot fix. Mastering this specialized cleaning process protects your health, eliminates persistent odors, and significantly extends the lifespan of your expensive sleep investment.
Key Takeaways
- Never submerge or saturate memory foam in water to avoid permanent structural damage.
- Use a gentle mixture of mild dish soap and cool water for spot cleaning.
- Apply baking soda to neutralize deep-set odors and absorb lingering moisture.
- Always air dry your mattress completely using fans before putting sheets back on.
- Install a waterproof mattress protector to prevent future deep-staining issues.
What Causes Deep Stains and Odors in Memory Foam Mattresses
Understanding the root cause of your mattress issues dictates the exact cleaning method you should use. Memory foam acts like a dense sponge, trapping liquids and organic matter deep beneath the surface fabric layers.
Common Contaminants Trapped in Memory Foam
- Body fluids and sweat: These leave behind yellow rings, salt deposits, and musty odors that require enzymatic breakdown.
- Accidental spills: Coffee, wine, and pet urine sink straight through the porous structure if not blotted immediately.
- Dead skin cells and dust mites: These microscopic debris build up over the years, triggering chronic allergies and asthma flare-ups.
Why Traditional Cleaning Methods Fail
Drenching memory foam with water or commercial carpet cleaners creates a hidden moisture trap that breeds mold within 24 to 48 hours. Furthermore, harsh chemical solvents like bleach or acetone dissolve the polyurethane foam matrix, leaving permanent structural indents. Knowing these risks ensures you choose non-invasive cleaning agents that protect the structural integrity of your mattress.
From Start to Finish: Deep Cleaning Your Memory Foam Mattress Explained
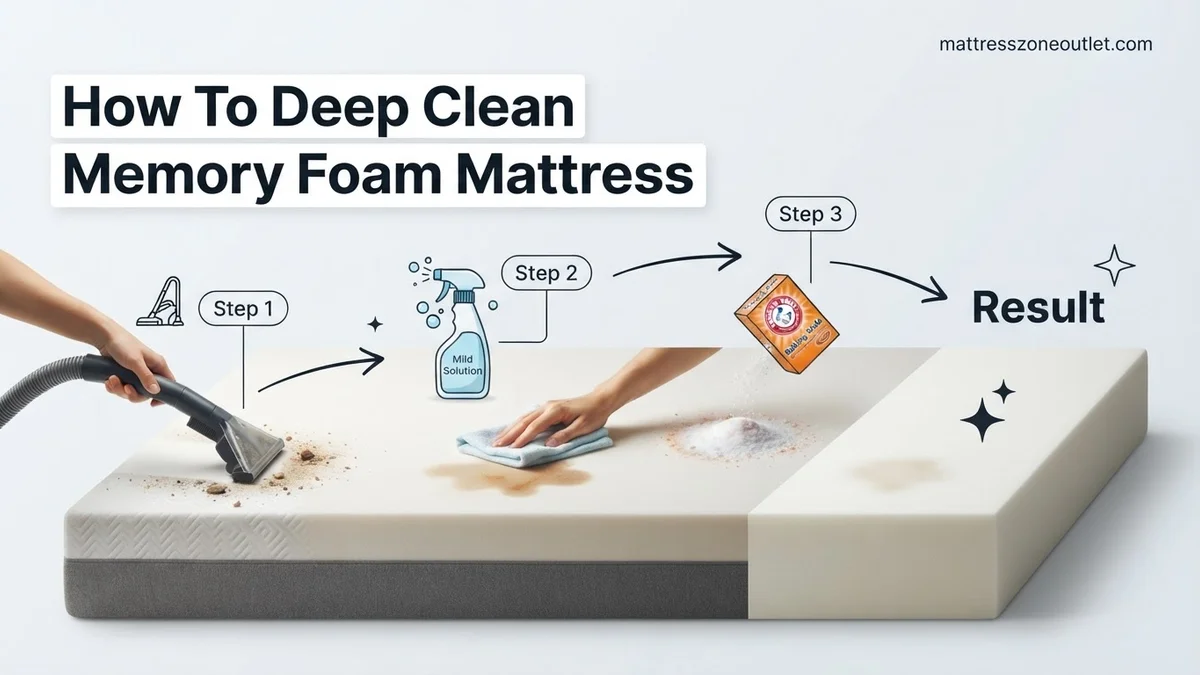
Memory foam mattresses contour to your body for incredible comfort, but they also trap sweat, dead skin cells, oils, and dust mites deep within their dense structures. Because you cannot simply toss a foam mattress into a washing machine, deep cleaning requires a delicate yet effective approach. This practical walkthrough will guide you through stripping, treating, deodorizing, and drying your mattress properly without ruining the foam’s integrity, ensuring a hygienic and fresh sleep surface for months to come.
Step 1: Strip and Launder All Bedding
What you need: Laundry detergent, a washing machine, a large laundry basket, and hot water settings.
Instructions: Remove all blankets, sheets, pillowcases, and mattress protectors from the bed. Transport them immediately to your laundry room to prevent dust mites and allergens from escaping back into the bedroom air. Wash all machine-washable bedding in hot water (at least 130 degrees Fahrenheit) to kill dust mites and eliminate trapped bodily oils and sweat. While your bedding is washing and drying, you will have completely unobstructed access to the mattress for the cleaning process.
Pro Tip: Always check the care labels on your mattress protector and pillows, as high heat can occasionally shrink certain specialized waterproof membrane covers.
Step 2: Thoroughly Vacuum the Surface
What you need: A vacuum cleaner with a clean upholstery attachment and a crevice tool.
Instructions: Attach the upholstery tool to your vacuum cleaner. Begin at the top left corner of the mattress and work your way across in slow, overlapping rows until you reach the bottom. Pay special attention to the tufts, seams, and piping where crumbs, pet hair, and skin flakes love to hide. Switch to the crevice tool to thoroughly vacuum along the taped edges and corners. Repeat this entire process on the sides and bottom of the mattress if you plan on flipping or rotating it later.
Pro Tip: Never use a stiff-bristled brush attachment on memory foam, as it can snag, tear, or permanently fuzz the delicate outer knit fabric casing of the mattress.
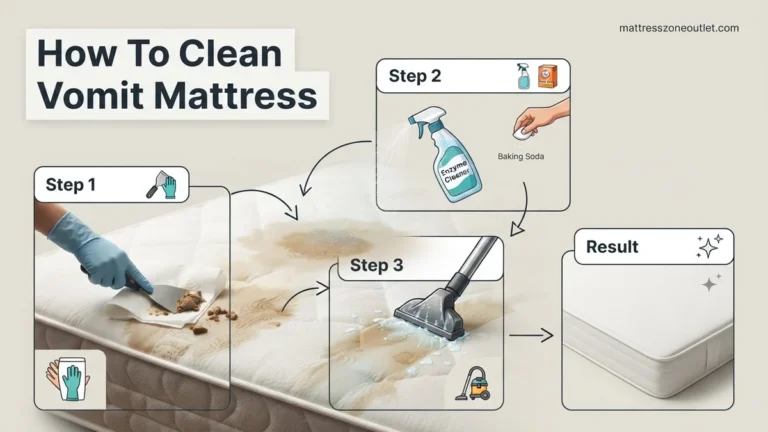
Step 3: Spot Treat Stains and Spills
What you need: Mild dish soap, hydrogen peroxide (for organic stains), cold water, a clean white microfiber cloth, and a spray bottle.
Instructions: Mix a solution of one part mild dish soap with two parts cold water in a small bowl or spray bottle. Lightly mist the stained area—never soak memory foam, as it absorbs moisture like a sponge and takes days to dry. Blot the stain gently with your microfiber cloth, working from the outside edges inward to prevent the stain from spreading. For stubborn organic stains like sweat or blood, dab a small amount of hydrogen peroxide directly onto the spot, let it fizz for 30 seconds, and blot dry with a clean cloth.
Pro Tip: Avoid using hot water or harsh chemical bleach on memory foam, as heat sets protein stains permanently and bleach breaks down the polyurethane cell structure.
Step 4: Deodorize with Baking Soda
What you need: 1 to 2 boxes of plain baking soda and a fine-mesh flour sifter.
Instructions: Fill your flour sifter with baking soda and evenly dust a generous layer across the entire top surface of the mattress. The sifter ensures an even distribution rather than heavy clumps. Baking soda is a natural amphoteric compound that neutralizes both acidic and basic odor molecules trapped deep within the foam’s dense pores. Gently rub the powder into the surface using circular motions with a clean, dry cloth or a soft-bristled brush to help it penetrate the top layer.
Pro Tip: For an extra-fresh scent, mix 10 to 15 drops of pure lavender or tea tree essential oil into the baking soda box and shake it well before sifting.
Step 5: Harness Natural Sunlight and Airflow
What you need: Sunlight from an open window, ceiling fans, or portable box fans.
Instructions: Allow the baking soda to sit on the mattress for a minimum of 4 to 8 hours. If possible, position portable box fans around the bed to circulate air continuously across the surface. If your mattress is light enough and you have a secure, private balcony or yard, tilt the mattress upright in direct sunlight for 2 to 3 hours. UV rays act as a natural disinfectant, killing lingering bacteria and driving out any residual moisture left over from your spot-cleaning efforts.
Pro Tip: Never place a memory foam mattress outdoors if the humidity is high, as the foam will absorb moisture from the air rather than drying out.
Step 6: Vacuum Away the Deodorizer
What you need: A vacuum cleaner with a clean upholstery attachment and a soft brush attachment.
Instructions: Once the baking soda has absorbed the trapped odors and oils, switch your vacuum back to the upholstery attachment. Vacuum the entire mattress surface meticulously, removing every trace of the white powder. Make multiple passes over the same areas to ensure no baking soda residue remains, which could otherwise feel gritty or cause skin irritation when you sleep. Inspect the mattress thoroughly under bright room lighting to confirm all stains are gone and the surface is completely dry to the touch.
Pro Tip: Tap the side of the mattress with your hand after vacuuming; if a puff of white dust rises into the air, you need to vacuum the surface once more.
Step 7: Protect and Remake the Bed
What you need: A waterproof, breathable mattress protector, fresh bed sheets, and clean pillows.
Instructions: Before putting your clean sheets back on, install a high-quality, waterproof yet breathable mattress protector. This acts as an impenetrable barrier against future sweat, spills, skin flakes, and dust mites, drastically reducing how often you will need to perform a deep clean. Once the protector is securely zipped or fitted over the mattress, dress the bed with your freshly laundered sheets, pillowcases, and comforter.
Pro Tip: Rotate your memory foam mattress 180 degrees head-to-toe while remaking the bed to ensure even wear over its lifetime.
✅ Final Checklist
- All bedding has been laundered in hot water and dried completely.
- The entire mattress surface and crevices have been thoroughly vacuumed.
- All localized stains were treated with minimal moisture and dried promptly.
- Baking soda sat for at least 4 hours and was completely vacuumed away.
- A clean, waterproof mattress protector was installed before remaking the bed.
Important Notes:
- Never submerge memory foam in water or use a steam cleaner, as excessive moisture promotes mold growth and destroys the foam’s structure.
- If your mattress has deep-set mold or mildew, stop cleaning and consult a professional restoration service or consider replacing the mattress entirely.
- Estimated time required: 6 to 10 hours (primarily waiting for baking soda and spot treatments to dry). Estimated cost: $5 to $15 for baking soda and cleaning supplies.
How to Vacuum and Prep Your Memory Foam Mattress
Preparation is the most critical phase of deep cleaning because you must remove all loose surface debris before introducing any liquid solutions. Applying moisture to a dusty mattress simply creates a muddy sludge that embeds dirt deeper into the foam cells.
Stripping and Initial Dry Cleaning
Remove all bedding, mattress protectors, and decorative pillows from the bed immediately. Wash your sheets and mattress cover in hot water to kill lingering dust mites while you work on the exposed foam surface. Inspect the entire mattress surface in bright daylight to map out every stain and odor zone.
Using the Upholstery Attachment Properly
- Equip your vacuum: Attach a clean upholstery tool to your vacuum cleaner to prevent transferring outside dirt onto your bed.
- Work in grid patterns: Vacuum slowly in overlapping horizontal and vertical passes across the entire top surface.
- Target seams and tufts: Spend extra time running the vacuum nozzle along the piped edges and stitched seams where skin flakes accumulate.
- Check the side panels: Vacuum the outer side gussets of the mattress to remove airborne dust and pet hair that settled during regular daily use.
How to Fix Tough Stains and Odors Step-by-Step
Memory foam is notoriously absorbent, trapping sweat, body oils, and stubborn organic spills deep within its high-density polyurethane structure. According to the Better Sleep Council, addressing these localized blemishes requires targeted enzymatic formulas rather than standard detergents, which can degrade sensitive foam polymers.
Step 1: Treat Organic Stains with Enzymatic Cleaners
- Mix a solution of equal parts cool water and clear, mild dish soap in a spray bottle, adding one tablespoon of white vinegar to help break down proteins.
- Lightly mist the stained area. Never saturate memory foam, as trapped moisture inside the dense core creates a breeding ground for mold and mildew.
- Blot the area firmly with a clean, dry microfiber cloth to lift the dissolved stain. Avoid rubbing, which pushes contaminants deeper into the foam cells.
- For stubborn biological stains like sweat or urine, apply a commercial enzymatic cleaner designed specifically for upholstery. Allow it to sit for 15 minutes before blotting.
Step 2: Neutralize Deep-Set Odors
- Cover the affected surface generously with a thick layer of pharmaceutical-grade baking soda to absorb residual volatile organic compounds.
- Allow the baking soda to sit undisturbed for a minimum of 8 to 12 hours. For optimal odor elimination in 2026, sleep technology experts recommend utilizing bright sunlight alongside baking soda if the mattress can be safely moved outdoors.
- Vacuum the neutralizing powder thoroughly using a clean upholstery attachment, making multiple slow passes across every tuft and crevice.
What If It Still Doesn’t Work?
If persistent odors or discoloration remain after a thorough deep clean, the contamination has likely penetrated the inner core of the mattress where surface treatments cannot reach. Consider these advanced fallback options:
- Rent a professional hot-water extraction unit: Specialized low-moisture upholstery extractors can be rented from local home improvement centers for roughly $30 to $50 per day, ensuring rapid extraction without over-wetting the sensitive foam.
- Hire a certified mattress restoration service: Professional deep-sanitization companies utilize industrial ozone generators or UV-C sterilization wands to neutralize deep-seated allergens and odors. This service typically ranges from $150 to $250.
- Consult the manufacturer warranty: Check your warranty documentation, as persistent structural degradation or deep staining paired with sagging may qualify you for a replacement under standard defect clauses.
- Invest in a high-grade waterproof encasement: If the foam is structurally sound but retains a faint scent, encase the mattress in a certified bed-bug-proof, waterproof barrier with a zipper lock to permanently trap odors and prevent future accidents.
Conclusion
Deep cleaning your memory foam mattress successfully eliminates trapped allergens, stubborn stains, and lingering odors that degrade your indoor air quality and sleep hygiene. By utilizing targeted enzymatic treatments and moisture-controlled extraction methods, you can dramatically extend the lifespan of your investment. According to verified research and sleep health experts, maintaining a rigorous biannual cleaning schedule significantly reduces dust mite populations and prevents premature foam breakdown. Your actionable next step for today is to strip your bed, check your mattress tag for manufacturer cleaning codes, and begin the baking soda deodorization process immediately.
❓ Frequently Asked Questions
What is the safest way to remove sweat stains from memory foam?
Mix a small amount of mild liquid dish soap with cool water to create suds, dip a cloth into the suds only, and gently blot the stained area. Wipe away residue with a damp cloth and blot dry immediately.
How can I get rid of blood stains without ruining the foam?
Create a paste of cold water and baking soda, apply it directly to the blood stain, and let it sit for 30 minutes. Gently wipe away the residue with a damp cloth and pat dry.
Can I use a hairdryer to speed up the drying process?
Avoid using a hairdryer or any direct high heat source, as high temperatures can melt or warp the polyurethane foam. Instead, use ceiling fans, box fans, or open windows.
How often should I deep clean my memory foam mattress?
You should vacuum your mattress every few months and perform a deep surface cleaning or deodorizing treatment every six months to maintain hygiene.
Why does my memory foam mattress smell like chemicals?
A chemical smell is usually off-gassing from a new mattress, which fades naturally. If an older mattress smells, it may be trapped body oils and moisture requiring baking soda treatment.
Is it possible to prevent mold growth during deep cleaning?
Yes, prevention relies entirely on using minimal moisture, blotting instead of rubbing, and ensuring the mattress is 100% dry before remaking the bed.