How to Fix Dent in Mattress Step-by-Step Guide 2026
A sagging mattress causes poor sleep and back pain, but you can fix mattress dents using straightforward DIY methods. Applying temporary supports like toppers or permanent adjustments like rotating can restore your mattress’s comfort.
You can fix a mattress dent and restore your sleep surface without buying a brand-new bed by using targeted DIY adjustments like strategic padding, flipping, and foundation reinforcement. Waking up with back pain because your body sinks into a permanent groove is frustrating, especially when modern mattress prices in 2026 continue to rise.
Addressing a body impression early saves you money and extends the usable lifespan of your mattress by several years. Whether you sleep on memory foam, innerspring, or a hybrid model, several practical methods can level out that frustrating dip.
Key Takeaways
- Rotate or flip your mattress regularly to distribute body weight evenly.
- Place a firm plywood board underneath to provide immediate structural support.
- Use a high-density memory foam topper to mask minor surface indentation.
- Check your product warranty if the body impression exceeds one inch.
- Know when a permanent structural failure means it is time for replacement.
What Causes Sagging and Dents in Your Mattress
Body Weight Distribution and Material Fatigue
Mattress dents happen naturally over time due to repeated pressure on the exact same spot. Every night, your hips and shoulders exert concentrated weight downward, breaking down the underlying comfort layers.
- Memory Foam: Loses its elasticity and cell structure under constant compression, leading to slow-recovery or permanent indentations.
- Innerspring Coils: Steel springs weaken and lose their tension, failing to push back up against your body weight.
- Hybrid Models: Experience both foam breakdown and coil fatigue simultaneously in high-pressure zones.
Inadequate Foundation Support
Sometimes the problem is not your mattress at all, but what sits underneath it. A sagging box spring, a broken bed frame slat, or a floor foundation that lacks central support will cause the entire mattress to dip in the middle. If the slats on your platform bed are spaced wider than 3 inches, the soft materials of your mattress will naturally push down into the gaps over time.
Sagging Mattresses Made Easy: Your Essential Action Plan
A dipping or indented mattress can ruin your sleep quality and leave you waking up with persistent lower back pain. Whether your mattress is made of memory foam, innerspring coils, or a hybrid material, ignoring a body impression will only make the structural breakdown worse over time. This comprehensive guide will walk you through the exact diagnostic, corrective, and preventative measures required to restore your bed to its original flat, supportive surface. By following these targeted steps, you can eliminate annoying dips, extend the functional lifespan of your investment, and finally enjoy uninterrupted, pain-free rest every single night.
Step 1: Diagnose the Depth and Source of the Indentation
What you need: A long straightedge tool (like a broom handle or carpenter level) and a metal tape measure.
Instructions: Strip all sheets, blankets, and mattress protectors off your bed so you have a completely bare surface. Place your straightedge horizontally across the width of the mattress spanning from one edge to the other over the suspected dip. Take your tape measure and measure the exact vertical distance from the bottom of the straightedge down to the lowest point of the mattress surface. If the depression is deeper than 1.5 inches on an innerspring or 1 inch on memory foam, structural failure is likely present. Document the location of the dip to determine if it aligns with your typical sleeping posture.
Pro Tip: Do not measure while sitting on the edge of the bed; the mattress must be completely at rest for at least two hours before taking accurate measurements.
Step 2: Strip and Vacuum the Entire Sleep Surface
What you need: A high-suction vacuum cleaner equipped with an upholstery attachment nozzle.
Instructions: Dust, dead skin cells, body oils, and microscopic debris accumulate deeply within the quilting and comfort layers of a mattress, often causing localized compression and fabric sagging. Attach the upholstery tool to your vacuum and methodically glide it across the entire top surface of the mattress. Pay special attention to the seams, tufted buttons, and the specific indented zone you identified in Step 1. Use slow, overlapping passes in a grid-like pattern to extract as much embedded particulate matter as possible, which immediately lightens compressed cushioning materials.
Pro Tip: Sprinkle a generous layer of baking soda across the mattress while vacuuming to absorb trapped moisture and oils that soften foam and worsen sagging.
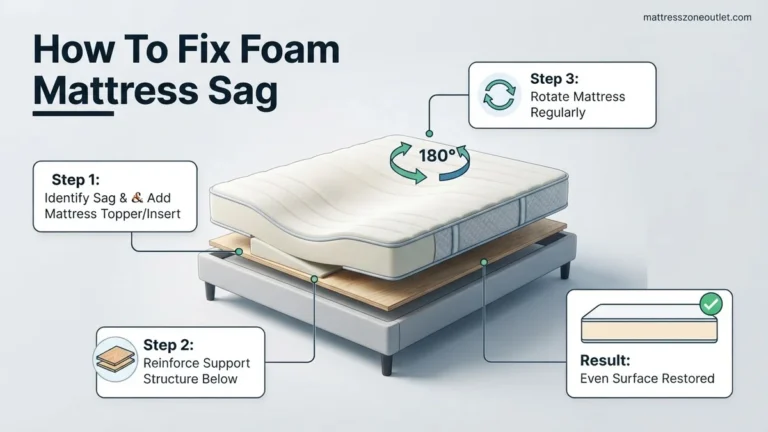
Step 3: Perform a 180-Degree Rotation
What you need: A partner to help lift, and potentially a furniture slider set.
Instructions: Grab the reinforced fabric handles on the sides of your mattress. Carefully lift and rotate the mattress a full 180 degrees so that the head of the mattress is now positioned where the foot used to be. This simple movement shifts your heavy upper-body weight away from the primary indent and places it over the firmer, less-compressed foot section. If your mattress is double-sided (flippable), check the manufacturer tag first before attempting to flip it vertically so the bottom side faces up.
Pro Tip: Rotate your mattress every three to six months religiously to promote even wear distribution and prevent future deep body impressions from forming.
Step 4: Inspect and Reinforce the Foundation or Box Spring
What you need: A flashlight, a screwdriver, and potentially plywood sheets (cut to 3/4-inch thickness).
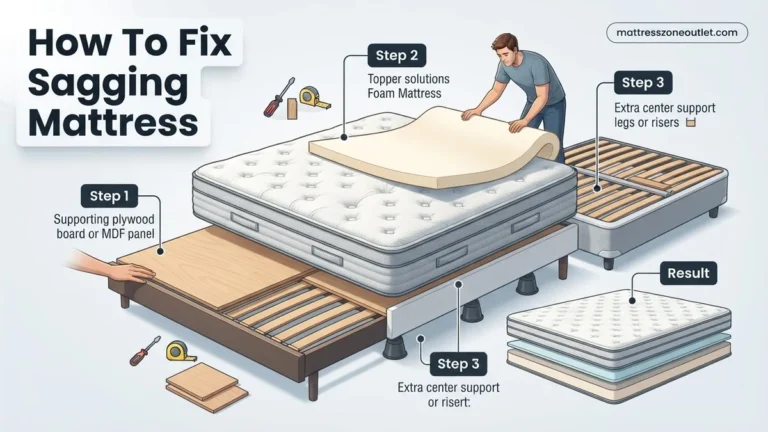
Instructions: Often, a sagging mattress is actually the result of a failing or unsupportive foundation beneath it. Remove the mattress entirely and inspect your box spring, slats, or bed frame platform. Look for cracked wooden slats, bent metal grid wires, or a warped center support beam. If your bed uses wooden slats spaced more than 3 inches apart, or if the box spring has lost its structural integrity, place a sheet of cut-to-size exterior-grade plywood directly over the slats to create a completely rigid, flat base for the mattress.
Pro Tip: Never place a modern foam mattress directly on an old, squeaky box spring containing traditional springs, as this accelerates sagging.
Step 5: Apply Targeted Heat to Memory Foam Dips
What you need: A standard handheld hair dryer set to medium heat.
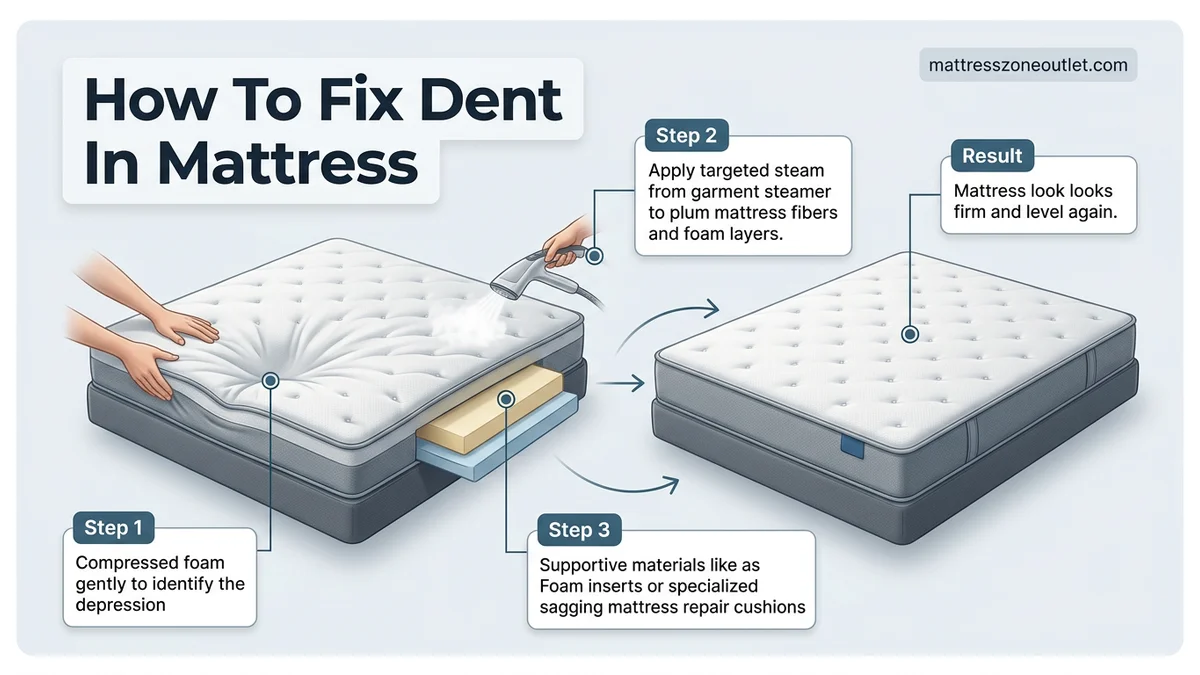
Instructions: If your mattress features memory foam layers that have lost their elasticity and formed a permanent body impression, you can use controlled heat to reactivate the foam cells. Hold the hair dryer approximately 8 to 12 inches away from the indented area. Keep the dryer moving continuously in a circular motion across the dip for about 5 to 10 minutes. Do not hold the heat in one spot too long, as this can scorch or melt synthetic foam materials. The warmth relaxes the polymer bonds within the foam, allowing the compressed material to rebound closer to its original loft.
Pro Tip: Immediately after heating the foam, massage and knead the area with your hands to help expand the compressed cellular structure.
Step 6: Install a High-Density Mattress Topper for Support
What you need: A 2-to-3-inch high-density latex or firm memory foam mattress topper.
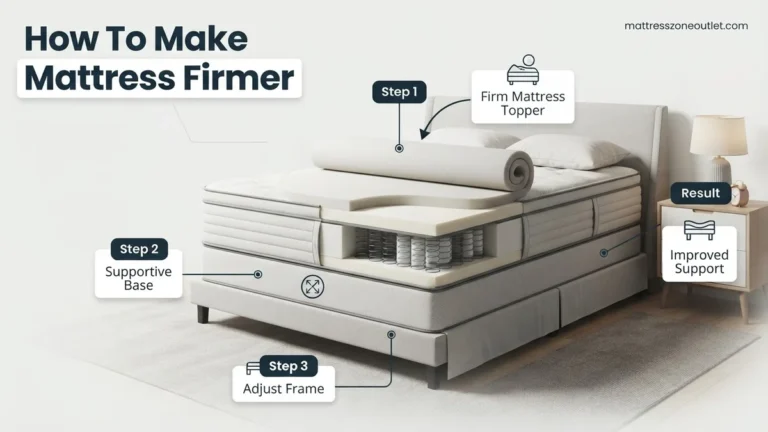
Instructions: If the internal materials of your mattress are permanently degraded and standard rotation or heat therapy fails to level the surface, a support topper is your best remedy. Place a firm, high-density topper directly over the mattress. The firm composition of the topper bridges across the gap of the underlying indentation, providing a flat, uniform sleeping plane that redistributes your body weight evenly across the entire bed frame rather than sinking into the localized dip.
Pro Tip: Choose a latex topper if you prefer a bouncy, responsive feel, or high-density memory foam if you want contouring support without bottoming out.
Step 7: Check Manufacturer Warranty and File a Claim
What you need: Original purchase receipt, warranty card, and a camera to take photographic proof.
Instructions: If your mattress is relatively new (usually under 10 years old) and the sagging exceeds the manufacturer’s threshold (typically 1.5 inches for most brands), it may be covered under warranty. Lay the mattress flat on the floor, place your straightedge across the dip, and take clear photographs showing the tape measure reading the exact depth of the indentation. Locate your original purchase invoice and law tag, then visit the manufacturer’s website to submit an official warranty claim for a replacement or prorated credit.
Pro Tip: Never remove the law tag from your mattress, as doing so automatically voids all manufacturer warranties instantly.
✅ Final Checklist
- Verified the exact depth of the mattress indentation using a straightedge and tape measure
- Thoroughly vacuumed the entire sleep surface and extracted embedded debris
- Rotated the mattress 180 degrees (and flipped if double-sided)
- Inspected the bed frame slats and foundation for cracks or lack of central support
- Applied targeted heat and massage to revive compressed foam cells
- Installed a high-density topper to bridge minor surface dips
- Documented sagging depth and warranty details if structural replacement is needed
Important Notes:
- Exercise caution when using heating tools near synthetic foam bedding to prevent melting or fire hazards.
- Seek professional help from furniture repair technicians if dealing with antique or bespoke specialty mattresses.
- Estimated time to complete all DIY steps ranges from 1 to 2 hours; financial cost varies from $0 (for rotation and cleaning) to $150 (for a quality support topper or plywood).
Step-by-Step DIY Methods to Fix a Mattress Dent
Rotate and Flip Your Mattress
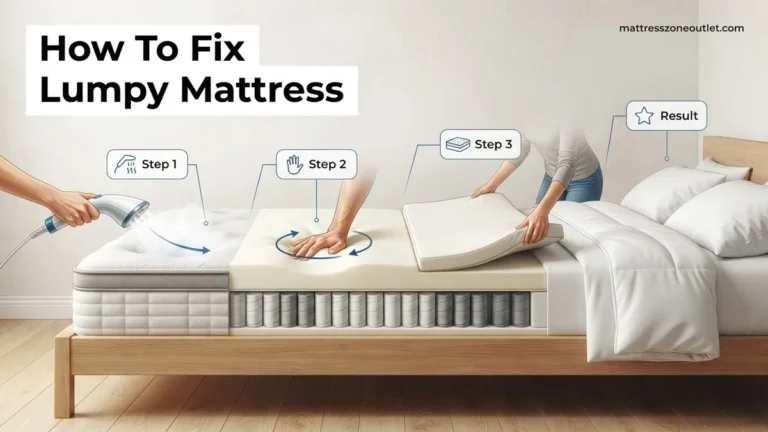
The simplest and most cost-effective way to combat a dent is changing where your body rests on the bed. If your mattress design allows it, flipping it upside down shifts the heavy wear to the undamaged top side.
- Rotation: Rotate your mattress 180 degrees every 3 to 6 months so your head rests where your feet used to be, distributing wear evenly.
- Flipping: Check if your model is two-sided. Modern 2026 hybrid and foam mattresses are often single-sided, meaning flipping them will put you on an unstable base layer. Rotate those models instead.
Add Targeted Padding and Mattress Toppers
If you cannot reverse the dent from the inside, you can mask it from the surface by leveling out the top plane of the bed. A high-density latex or memory foam topper adds a uniform layer of comfort over the entire surface.
- Strategic Stuffing: For localized dips, unzip the mattress cover (if removable) and slide folded towels, dense foam scraps, or a small pillow directly beneath the sagging area inside the core.
- High-Density Toppers: Invest in a 2-to-3-inch thick memory foam or latex topper. It bridges the gap over the indentation and distributes your weight more broadly across the bed.
How to Support Your Mattress Base to Prevent Further Sagging
Even after you successfully fix a dent, the underlying foundation may cause the indentation to return. According to the Better Sleep Council, up to 40 percent of premature mattress degradation stems from inadequate support beneath the bed. Upgrading your base ensures weight distributes evenly across the entire sleep surface in 2026.
Check Your Box Spring or Foundation
An aging or broken foundation accelerates body impressions. Wooden slats spaced more than 3 inches apart fail to provide adequate support for modern memory foam and hybrid mattresses.
- Strip all bedding down to the bare mattress to inspect the setup.
- Measure the gap distance between your bed frame slats using a tape measure.
- Add a solid piece of ¾-inch plywood over wide slats if spacing exceeds 3 inches.
- Replace a sagging or squeaking box spring with a rigid platform foundation immediately.
Assess Your Bed Frame Center Support
Queen, king, and California king frames require robust center support legs to prevent bowing. If your frame lacks a center support beam, the middle of the mattress naturally dips over time.
- Crawl under your bed and inspect the central metal beam for bending or loose hardware.
- Install heavy-duty aftermarket center support legs featuring adjustable feet.
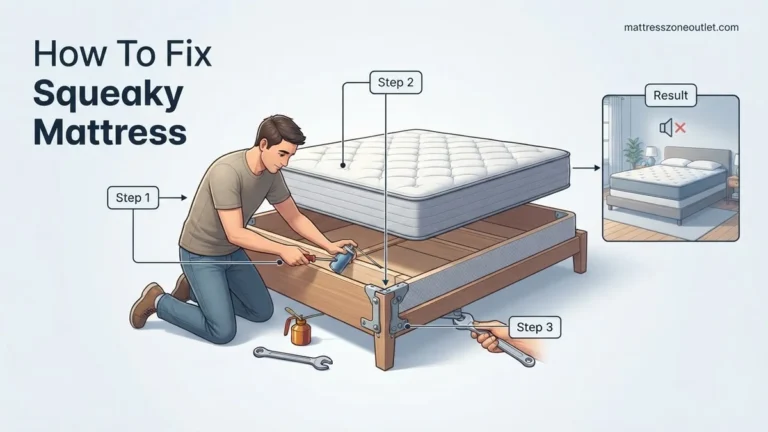
- Tighten all connecting bolts and brackets to eliminate structural shifting.
What If It Still Doesn’t Work and When to Replace
Sometimes DIY fixes cannot rescue a severely compromised sleep surface. When material fatigue reaches the core support layers, temporary patches fail to restore proper spinal alignment. Consider these advanced fallback steps before abandoning your bed:
- Professional Inspection: Contact your mattress manufacturer to assess structural failure under the original warranty terms.
- Warranty Claims: File a formal warranty claim if the body impression exceeds the standard industry threshold of 1.0 to 1.5 inches deep. Replacement or prorated credit typically applies.
- High-Density Foam Replacement: Hire an upholstery professional to open the mattress casing and replace degraded core foam layers. Estimated costs range from $150 to $300.
- Complete Replacement: Purchase a new mattress if the current model exceeds the 7-to-10-year lifespan recommended by sleep ergonomics experts.
Conclusion
Dealing with a mattress dent disrupts sleep quality and causes chronic lower back pain. Applying targeted heat, using high-density topper inserts, and reinforcing your foundation can successfully restore a level sleeping surface. According to verified research and expert sources from the International Sleep Products Association, timely maintenance extends bed longevity significantly. Take action today by inspecting your mattress base and implementing a supportive topper to protect your spine.
❓ Frequently Asked Questions
How can I tell if my mattress dent is causing my back pain?
If your spine falls out of neutral alignment while lying down and you wake up with lower back stiffness, the indentation is likely the culprit. A mattress that no longer supports your lumbar region forces muscles to strain overnight.
Can I stuff the inside of my mattress to fix a sag?
For zippered mattresses, you can add extra foam or batting inside the cover to fill the gap. However, this is a temporary fix and does not restore the underlying structural integrity of the core support layer.
Do mattress toppers actually fix body impressions?
Toppers do not physically repair the damaged support layers underneath, but they provide a smooth, level comfort layer on top. A thick latex or high-density memory foam topper effectively bridges shallow dents.
How often should I rotate my mattress to prevent dents?
You should rotate your mattress 180 degrees every three to six months. This prevents wear and tear from concentrating heavily on the exact same areas where your hips and shoulders rest.
What kind of foundation causes a mattress to sag prematurely?
Worn-out box springs with broken coils, slatted frames with gaps wider than three inches, or floors that lack central support will cause a mattress to sink. Ensuring a solid foundation prevents premature denting.
Is it safe to sleep on a mattress with a permanent deep dent?
While not immediately dangerous, sleeping on a severely sagged mattress forces unnatural spinal curves. This frequently leads to chronic back pain, muscle fatigue, and disrupted sleep quality over time.